The Ultimate Guide to Perfect Grilled Beef Ribs: Tender, Juicy & Smoky Every Time
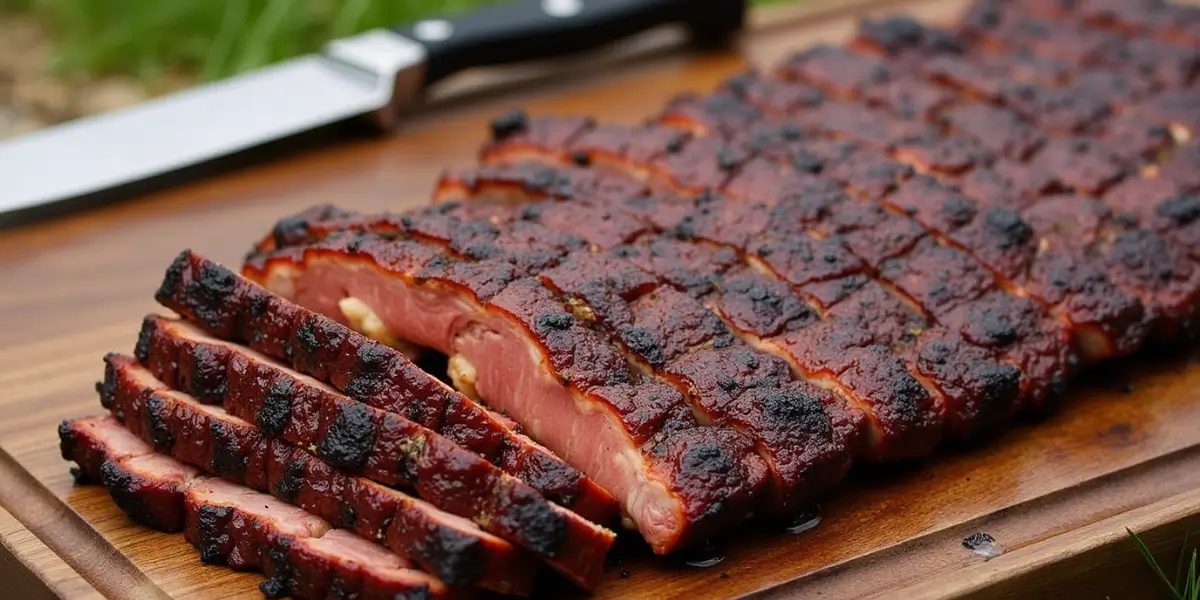
Remember that smell? The one that instantly transports you to a sun-drenched backyard, drink in hand, surrounded by friends and family? It’s the unmistakable, mouth-watering aroma of meat cooking low and slow over fire. And when it comes to truly epic barbecue experiences, few things rival the primal satisfaction of perfectly cooked, tender, fall-off-the-bone grilled beef ribs.
Maybe you’ve tried before, only to end up with ribs that were disappointingly tough or frustratingly dry. Or perhaps you’re a grilling enthusiast looking to level up your game and conquer the king of backyard BBQ. Whatever your starting point, you’re in the right place.
Forget chewy disappointment. Forget guesswork. Today, we’re diving deep into the glorious world of grilled beef ribs. We’ll walk you through everything – from choosing the right cut and prepping it perfectly, to mastering the grill setup and achieving that legendary tenderness. Consider this your roadmap to becoming the undisputed rib champion of your neighborhood. Get ready to fire up the grill and create some unforgettable flavor!
Choosing Your Weapon: Selecting the Best Beef Ribs for Grilling
Before you even think about firing up the coals or propane, the journey to incredible grilled beef ribs starts at the butcher counter or grocery store. Choosing the right cut and knowing what to look for is paramount. Not all beef ribs are created equal when it comes to grilling.
Decoding the Cuts: Beef Back Ribs vs. Short Ribs (Plate & Chuck)
Understanding the different types of beef ribs available is your first step:
- Beef Back Ribs: These come from the upper part of the cow, near the prime rib roast. They typically have less meat on top of the bones but plenty of delicious meat between them. Think of them as the beef equivalent of baby back pork ribs. They generally cook a bit faster than short ribs due to having less overall meat mass. They are fantastic when grilled, offering rich beefy flavor.
- Beef Plate Short Ribs (aka “Dino Ribs”): These are the rockstars you often see in BBQ competitions. Cut from the lower rib cage (the plate primal), these are thick, meaty, and impressive-looking, usually sold as a 3 or 4-bone rack. They have a generous layer of meat on top of the bone and incredible marbling, leading to exceptionally rich and tender results when cooked low and slow. They require a longer cooking time but the payoff is immense.
- Chuck Short Ribs: Cut from the shoulder area (the chuck primal), these are also meaty and well-marbled. They are often shorter and thicker than plate ribs and might be sold as individual ribs or smaller racks. Like plate ribs, they benefit greatly from a low and slow cooking process to break down connective tissues and render fat, resulting in deep flavor and tenderness.
Which to choose? For a classic, beefy flavor that cooks slightly faster, back ribs are great. For the ultimate, show-stopping, melt-in-your-mouth experience (and if you have the time), go for plate or chuck short ribs.
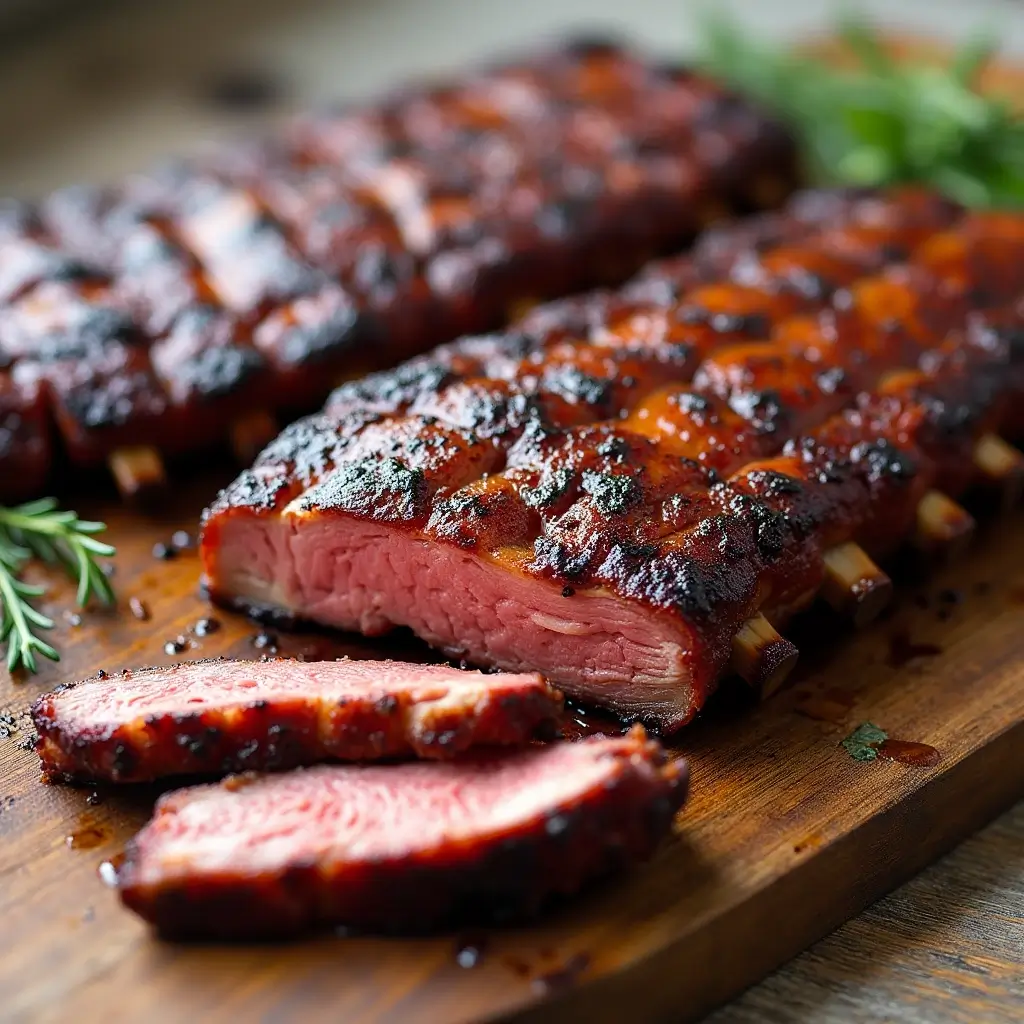
What to Look For at the Butcher: Marbling, Thickness, and Quality Signs
Regardless of the cut, here’s what signifies quality:
- Good Marbling: Look for thin veins of intramuscular fat running through the meat. This fat renders during cooking, adding moisture and incredible flavor. More marbling generally equals more tender and juicy ribs. For short ribs especially, good marbling is crucial.
- Meat Thickness: Especially for short ribs, look for thick, meaty specimens. You want a good amount of meat on top of the bone, not just between them. Avoid racks that look thin or shriveled.
- Color and Appearance: Fresh beef should have a vibrant, deep red color. Avoid meat that looks greyish or has dry spots. The fat should be creamy white, not yellow or grey.
- Uniformity: If buying a rack, try to find one where the ribs are relatively uniform in size and thickness. This helps ensure more even cooking.
Don’t hesitate to ask your butcher for advice! They can often help you select the best ribs available and may even trim them for you.
Essential Prep Work: Trimming Fat Caps and Removing the Membrane
Proper preparation sets the stage for success:
- Trimming Excess Fat: While you want good marbling within the meat, thick layers of hard fat on top (the fat cap) won’t fully render during grilling and can prevent smoke and rub penetration. Trim this down to about 1/4 inch thickness. This allows the fat to render nicely without becoming greasy or creating flare-ups.
- Removing the Membrane (Silver Skin): This is crucial, especially for back ribs (short ribs sometimes have it removed, but always check). On the bone-side of the rack, there’s a thin, tough, silvery membrane. This membrane doesn’t break down during cooking, stays chewy, and prevents the rub from flavoring the meat underneath. To remove it, slide a dull knife (like a butter knife) under one edge of the membrane to loosen it. Grab the loosened edge with a paper towel (for grip) and gently pull it off the entire rack. It might come off in one piece or several strips. Patience here pays off big time in the final texture.
Once trimmed and the membrane is removed, your ribs are ready for the flavor treatment!
The Flavor Foundation: Crafting the Perfect Rub and Marinade for Grilled Beef Ribs
With your glorious racks of beef ribs prepped, it’s time to build those layers of flavor that make barbecue so irresistible. Whether you prefer a classic dry rub or the deep penetration of a marinade, seasoning is key for unforgettable grilled beef ribs.
Mastering the Dry Rub: Key Ingredients for a Savory Crust
A good dry rub is essential for creating that delicious, crusty bark on the outside of your ribs. It seasons the meat directly and interacts with the smoke and heat to form a complex flavor profile. While countless variations exist, a solid foundation often includes:
- Salt: Essential for flavor and helps draw moisture to the surface, aiding bark formation. Kosher salt or coarse sea salt works best.
- Pepper: Coarse black pepper provides a pungent kick. Many Texas-style rubs rely heavily (sometimes exclusively) on salt and pepper.
- Paprika: Adds color and mild sweetness. Smoked paprika contributes an extra layer of smokiness.
- Garlic Powder & Onion Powder: Provide foundational savory, aromatic notes.
- Other Spices (Optional): Chili powder, cayenne pepper (for heat), cumin (earthiness), mustard powder (tang), celery seed, or even a touch of brown sugar (for sweetness and caramelization – use sparingly on beef ribs to avoid burning).
Application: Pat your ribs dry with paper towels. Apply a binder if using (see next point), then generously sprinkle the dry rub all over the meat, including the sides and edges. Gently pat it in – don’t rub too aggressively, or you might dislodge it. Let the ribs sit with the rub for at least 30 minutes at room temperature before grilling, or ideally, wrap them and refrigerate for several hours (or overnight) for deeper flavor penetration.
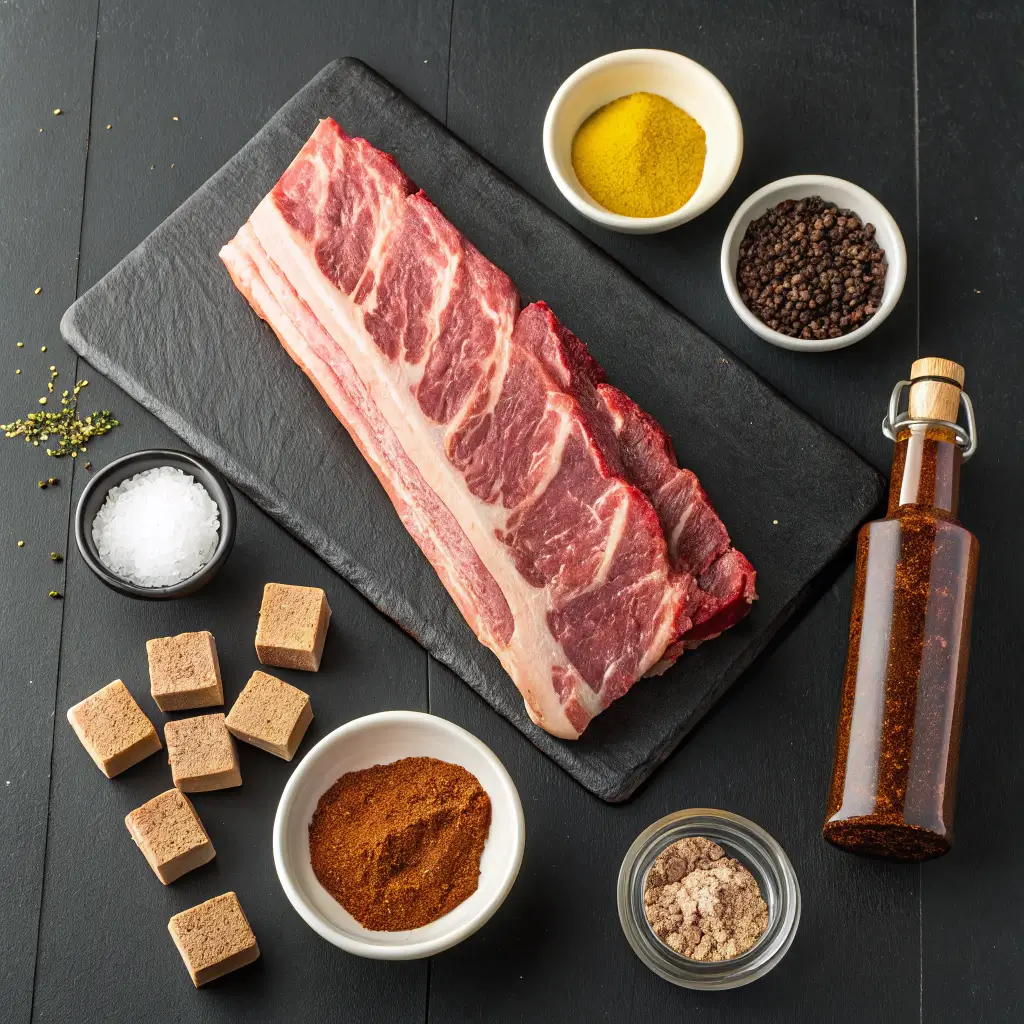
Table 1: Simple All-Purpose Beef Rib Dry Rub Recipe
| Ingredient | Amount | Notes |
| Kosher Salt | 1/4 Cup | Coarse grain is ideal |
| Coarse Black Pepper | 1/4 Cup | Freshly ground if possible |
| Paprika | 2 Tablespoons | Use sweet or smoked paprika |
| Garlic Powder | 1 Tablespoon | Granulated works well |
| Onion Powder | 1 Tablespoon | Adds depth |
| Chili Powder | 1 Teaspoon | Optional, for mild warmth |
| Cayenne Pepper | 1/2 Teaspoon | Optional, adjust for desired heat level |
(Mix all ingredients thoroughly in a bowl. Store leftover rub in an airtight container.)
Wet Marinades vs. Binders: When and Why to Use Them
- Wet Marinades: While less common for classic low-and-slow beef ribs compared to pork, a marinade can be used, especially for thinner cuts or if you desire a specific flavor profile (like a teriyaki or mojo-style beef rib). Marinades typically contain an acid (vinegar, citrus juice), oil, salt, and seasonings. They can help tenderize slightly and infuse flavor deeper into the meat. Marinate for at least 4 hours, or preferably overnight. Important: Pat the ribs dry after removing them from the marinade before applying any dry rub to ensure good bark formation.
- Binders: A binder isn’t primarily for flavor but acts as a “glue” to help the dry rub adhere better to the meat surface. Common binders include yellow mustard, Worcestershire sauce, olive oil, or even hot sauce. Apply a very thin layer all over the ribs before adding the dry rub. The binder’s flavor is usually negligible after cooking, but it significantly helps in creating that perfect crust. This is a very popular technique for grilled beef ribs.
Building Flavor Profiles: From Classic BBQ to Spicy & Bold
Don’t be afraid to experiment!
- Classic Texas Style: Focus heavily on kosher salt and coarse black pepper (often a 50/50 ratio by volume). Simple, allowing the rich beef flavor and smoke to shine.
- Savory & Herby: Incorporate dried herbs like rosemary, thyme, or oregano into your rub for an earthy, aromatic profile.
- Sweet & Spicy: Add brown sugar (carefully, as it can burn) along with cayenne pepper, chipotle powder, or red pepper flakes for a balanced kick.
- Coffee-Infused: Finely ground coffee or espresso powder adds incredible depth and complexity that pairs wonderfully with beef.
The key is balance. Taste your rub before applying (be mindful of the raw meat contact later) and adjust seasonings as needed.
The Art of the Grill: Techniques for Tender, Smoky Grilled Beef Ribs
This is where the magic happens. Grilling beef ribs, especially the thicker short rib varieties, is a marathon, not a sprint. Patience and proper technique are your best friends for achieving that melt-in-your-mouth tenderness that defines exceptional grilled beef ribs.
Setting Up Your Grill: Mastering Indirect Heat for Low & Slow Cooking
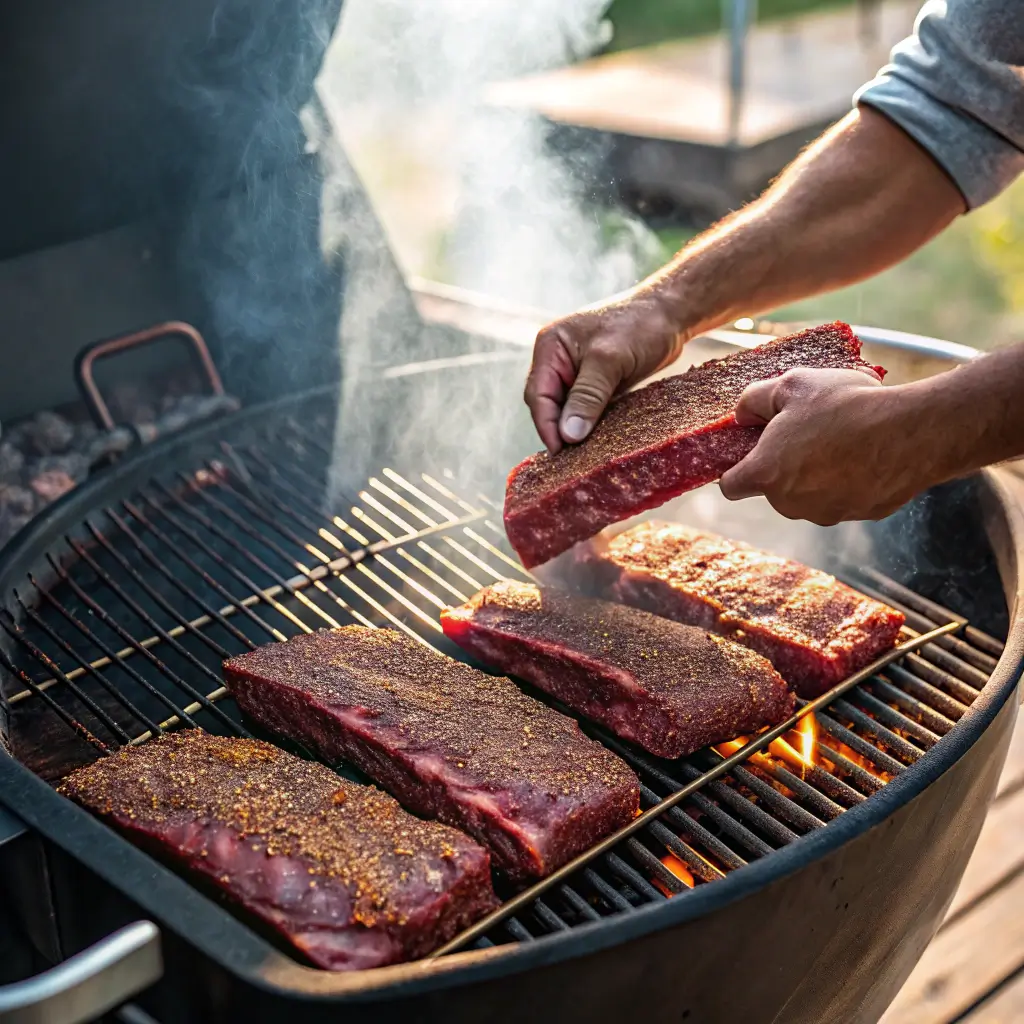
For tender beef ribs, indirect heat is non-negotiable. This means the ribs are not placed directly over the heat source, allowing them to cook slowly and evenly via convection, much like in an oven. Direct heat would scorch the outside long before the tough connective tissues inside have a chance to break down.
- Charcoal Grill Setup:
- Two-Zone Fire: Bank your lit coals on one side of the grill, leaving the other side empty. Place a drip pan filled with water or beef broth under the empty side (optional, but helps with moisture and cleanup). Place the ribs on the cool side, away from the coals.
- Snake Method/Minion Method: Arrange unlit coals in a C-shape or ring around the edge of the grill, adding wood chunks intermittently. Light only a few coals at one end. The fire will slowly burn along the chain, providing hours of steady, low heat. Place ribs in the center.
- Gas Grill Setup:
- Turn on the burners on one side of the grill (e.g., left and center burners on low/medium-low). Leave the other side (e.g., right burner) off.
- Place the ribs over the unlit burner(s).
- Use a smoker box filled with wood chips or chunks placed over the lit burners to generate smoke, or utilize foil packets with wood chips.
Wood for Smoking: Adding wood chunks (for charcoal) or chips (for gas/smoker boxes) imparts that crucial smoky flavor. Popular choices for beef include:
- Oak: A classic, balanced smoke that complements beef beautifully.
- Hickory: Stronger, pungent smoke – use sparingly or mix with milder woods.
- Mesquite: Very strong, intense flavor – best for shorter cooks or mixed in small amounts.
- Pecan: Similar to hickory but milder and slightly sweeter.
- Cherry/Apple: Mild, slightly sweet fruitwoods (less traditional for beef but can work).
Place 2-3 wood chunks on the coals or your wood chips in the smoker box/foil pack at the beginning of the cook.
Temperature is King: Maintaining Consistent Heat (Charcoal vs. Gas)
Low and slow is the name of the game. Aim for a consistent grill temperature between 225°F and 275°F (107°C – 135°C).
- Monitoring: Don’t rely solely on the thermometer built into your grill lid, as they can be inaccurate. Use a reliable digital probe thermometer placed at grate level near the ribs to monitor the ambient cooking temperature.
- Charcoal Control: Adjust the top and bottom vents on your charcoal grill to regulate airflow and temperature. Opening vents increases temperature; closing them decreases it. Make small adjustments and wait 10-15 minutes to see the effect. You’ll likely need to add more lit coals or wood chunks during a long cook.
- Gas Control: Adjust the burner knobs to maintain the target temperature. Gas grills are generally easier to keep steady but might struggle to maintain very low temperatures, especially on hot days. Monitor fuel levels.
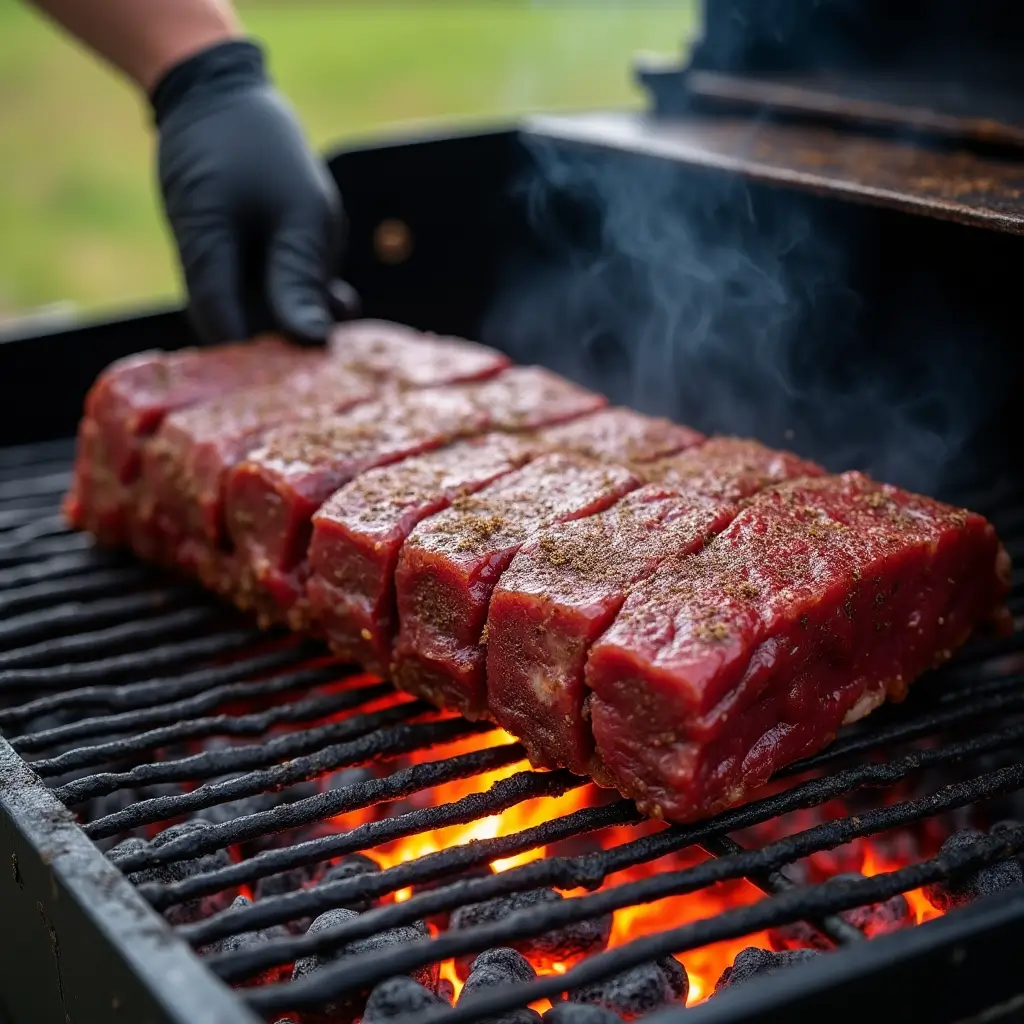
Consistency is key. Wild temperature swings will make it difficult to predict cooking times and achieve perfect tenderness.
Cooking Methods & Timing: The Low & Slow Journey (Wrapping Optional – The Texas Crutch)
Place your seasoned ribs bone-side down on the indirect heat side of the grill. Close the lid and let the low heat and smoke work their magic.
- Estimated Timing: This varies hugely based on rib type, thickness, grill temp consistency, and weather.
- Beef Back Ribs: Might take 3-5 hours.
- Beef Short Ribs (Plate/Chuck): Often take 6-10 hours, sometimes even longer.
- The Stall: Don’t panic if the internal temperature of the meat seems to plateau or “stall” for an extended period (often around 150°F-165°F). This is normal, caused by evaporative cooling. You can either wait it out or wrap the ribs.
- Wrapping (The Texas Crutch – Optional): Around the 160°F-170°F internal mark, or when the bark has set and has the color you like, you can wrap the ribs tightly in butcher paper (preferred for maintaining bark) or aluminum foil (steams more, potentially softening bark but speeding up the cook and increasing tenderness). You can add a splash of liquid like beef broth, apple cider vinegar, or beer before sealing the wrap. Place the wrapped ribs back on the grill.
- Checking for Doneness: Forget cooking by time alone. Use temperature and feel:
- Internal Temperature: The target internal temperature for tender grilled beef ribs is typically 203°F – 205°F (95°C – 96°C) in the thickest part of the meat, avoiding the bone. This is the point where collagen has rendered into gelatin.
- Probe Tender: The ultimate test. Insert an instant-read thermometer probe or a skewer into the thickest part of the meat between the bones. It should slide in and out with very little resistance, like probing room-temperature butter. This is more reliable than temperature alone.
- Bend Test: Carefully lift the rack from one end with tongs. It should bend significantly in the middle, and the meat should show signs of cracking or separating from the bone.
Be patient! Rushing beef ribs is the surest way to toughness. Trust the process and rely on temperature and feel.
Finishing Touches & Feasting: Nailing the Landing
You’ve navigated the long cook, your ribs are probe tender, and the aroma is driving you wild. Just a couple more steps stand between you and barbecue nirvana. Don’t stumble at the finish line!
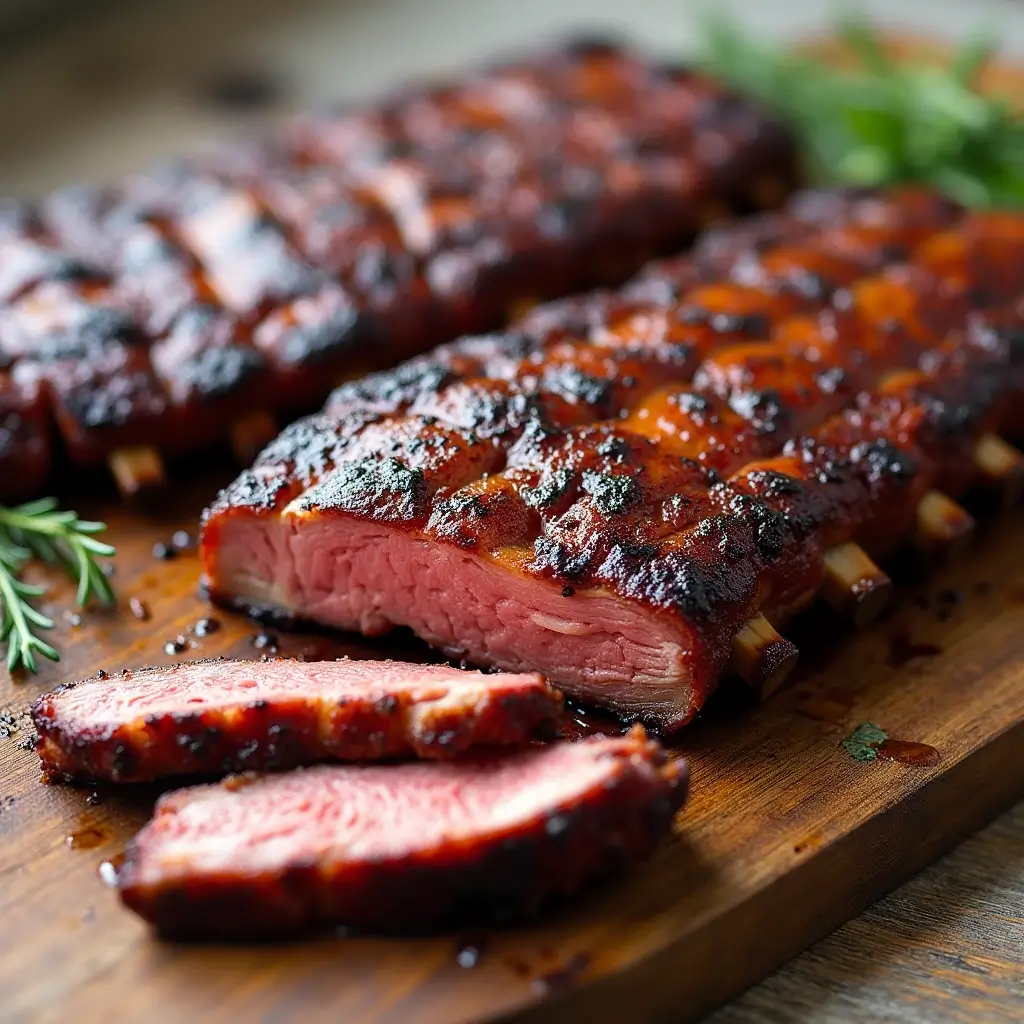
To Sauce or Not to Sauce: Applying BBQ Sauce Like a Pro
This is a matter of personal preference and regional style (e.g., Texas often goes sauceless). If you do want to sauce your grilled beef ribs:
- Timing is Everything: Apply BBQ sauce only during the last 20-30 minutes of cooking, or even after you pull the ribs off to rest. Most sauces contain sugar, which will burn and turn bitter if applied too early over direct or even high indirect heat.
- Thin Coats: Brush on a thin layer of your favorite BBQ sauce. Let it heat up and “set” on the ribs for 10-15 minutes. You can apply a second thin coat if desired just before pulling them off the grill. You want the sauce to complement the meat and smoke, not drown it.
- Warm the Sauce: Gently warming the sauce before applying can help it brush on more evenly.
- Sauce on the Side: A great option is to serve the ribs “dry” (with just the rub bark) and offer warmed BBQ sauce on the side for dipping, letting everyone customize their own experience.
The Unskippable Step: Why Resting Your Grilled Beef Ribs is Crucial
This might be the hardest part – waiting when everything smells so good! But resting your grilled beef ribs is absolutely essential for juiciness and tenderness.
- Why Rest? While cooking, the muscle fibers in the meat contract and push moisture towards the surface. If you slice immediately, all that delicious juice will pour out onto your cutting board, leaving the meat dry. Resting allows the muscle fibers to relax and reabsorb that moisture, distributing it evenly throughout the meat.
- How to Rest: Carefully remove the ribs from the grill. If they were wrapped, you can leave them loosely wrapped or unwrap them. Tent them loosely with aluminum foil (don’t seal it tightly, or the residual steam can soften your hard-earned bark).
- Duration: Let the ribs rest for at least 15-20 minutes. For large racks of short ribs, a 30-45 minute rest (or even longer, potentially in a dry cooler – faux cambro style) is even better. The internal temperature will drop slightly, but the quality improvement is immense.
Slicing, Serving, and Perfect Pairings (Sides & Drinks)
The moment of truth has arrived!
- Slicing: Place the rested rack bone-side up on a large cutting board. This makes it easier to see the bones and guide your knife. Use a sharp knife (a serrated or brisket knife works well) and slice cleanly between the bones.
- Serving: Arrange the sliced ribs on a platter. Garnish with a little fresh parsley or chopped chives if you’re feeling fancy.
- Perfect Pairings: What goes well with rich, smoky grilled beef ribs?
- Sides: Classic BBQ sides are always winners: creamy coleslaw, tangy potato salad, baked beans, mac and cheese, cornbread, grilled corn on the cob, pickles, and pickled onions (great for cutting the richness).
- Drinks: Cold beer (lagers, pilsners, or even a robust porter), iced tea, lemonade, or a bold red wine like a Zinfandel or Cabernet Sauvignon can stand up to the rich flavors.
Now, gather your appreciative audience and prepare for the accolades!
Table 2: Step-by-Step Grilled Beef Ribs Recipe (Low & Slow Indirect Method)
| Step | Action | Notes |
| 1. Prep | Choose ribs (Back or Short). Trim excess fat cap (to 1/4″). Remove membrane from bone side. | Pat ribs dry with paper towels. |
| 2. Season | Apply thin layer of binder (optional, e.g., mustard). Generously apply dry rub (see Table 1 or your favorite) all over. | Let sit at room temp for 30 min or refrigerate for hours/overnight. |
| 3. Grill Setup | Set up grill for indirect heat (225°F-275°F / 107°C-135°C). Add wood chunks/chips for smoke. Place drip pan with water (optional). | Monitor temp at grate level with a reliable thermometer. |
| 4. Cook | Place ribs bone-side down on the indirect heat side. Close lid. Maintain consistent temp. | Expect 3-5 hrs for Back Ribs, 6-10+ hrs for Short Ribs. |
| 5. Monitor | Monitor internal temp. Expect a stall around 150°F-165°F. | Be patient! Don’t increase grill temp drastically. |
| 6. Wrap (Optional) | If desired, wrap tightly in butcher paper or foil around 160°F-170°F internal temp or when bark is set. Add splash of liquid if using foil. | Wrapping can speed up cook and increase moisture, potentially softening bark (less so with paper). |
| 7. Finish | Continue cooking until internal temp reaches 203°F-205°F (95°C-96°C) AND ribs are probe tender (probe slides in/out easily). | Check tenderness in multiple spots between bones. |
| 8. Sauce (Optional) | If saucing, brush on thin layer(s) during the last 20-30 minutes of cooking. | Avoid applying too early to prevent burning. |
| 9. Rest | Remove ribs from grill. Tent loosely with foil. Rest for 15-45 minutes (longer for thicker short ribs). | CRUCIAL STEP for juiciness. |
| 10. Slice & Serve | Place bone-side up. Slice between bones with a sharp knife. Serve immediately with desired sides. | Enjoy your masterpiece! |
Conclusion: Your Journey to Grilled Beef Rib Mastery
You’ve done it! From selecting the perfect cut and meticulously prepping it, to patiently managing the fire and smoke, and finally, achieving that glorious state of probe-tender perfection – you now hold the secrets to incredible grilled beef ribs.
Remember the key takeaways: choose quality meat, prep it right (don’t forget that membrane!), build flavor with a great rub, embrace the low and slow indirect heat method, cook to temperature and feel (probe tender is your goal!), and never, ever skip the crucial resting period.
Mastering grilled beef ribs is a rewarding journey that takes practice, patience, and a love for great food cooked over fire. It’s about more than just dinner; it’s about creating experiences, sharing moments, and savoring the deep, satisfying flavors that only come from time and care. The results – those smoky, juicy, tender ribs that fall off the bone – are well worth the effort.
Frequently Asked Questions (FAQ) about Grilled Beef Ribs
Q1: How long does it typically take to cook truly tender grilled beef ribs?
A: Cooking time for grilled beef ribs varies significantly based on the cut, thickness, and cooking temperature. For beef back ribs cooked low and slow (225°F-275°F), expect 3-5 hours. For thicker, meatier beef short ribs (plate or chuck), plan for 6-10 hours, sometimes even longer, to reach the ideal internal temperature (203°F-205°F) and achieve probe tenderness, ensuring your grilled beef ribs are perfectly done.
Q2: Should I boil my grilled beef ribs before putting them on the grill?
A: No, it’s generally not recommended to boil grilled beef ribs before grilling. Boiling can render out too much fat and flavor, resulting in a less tasty and potentially mushy texture. The low and slow grilling method described above is designed to break down tough connective tissues and render fat properly while infusing smoky flavor, giving you much better results for your grilled beef ribs than boiling.
Q3: What’s the ideal internal temperature for perfectly cooked grilled beef ribs?
A: The target internal temperature for tender, melt-in-your-mouth grilled beef ribs is typically between 203°F and 205°F (95°C – 96°C). However, temperature alone isn’t the only indicator. You should always check for “probe tenderness” – inserting a thermometer probe or skewer should feel like pushing into room-temperature butter with very little resistance. Achieving this ensures the collagen in the grilled beef ribs has fully rendered, resulting in maximum tenderness.
What Are You Waiting For?
You’re now armed with the knowledge and techniques to conquer grilled beef ribs. The grill is calling!
Ready to fire it up? Try this method for incredible grilled beef ribs this weekend! We’d love to hear about your experience – share your results, photos, or any questions you have in the comments below. Happy grilling!
Are You Try This Recipe ?
There are no reviews yet. Be the first one to write one.

