
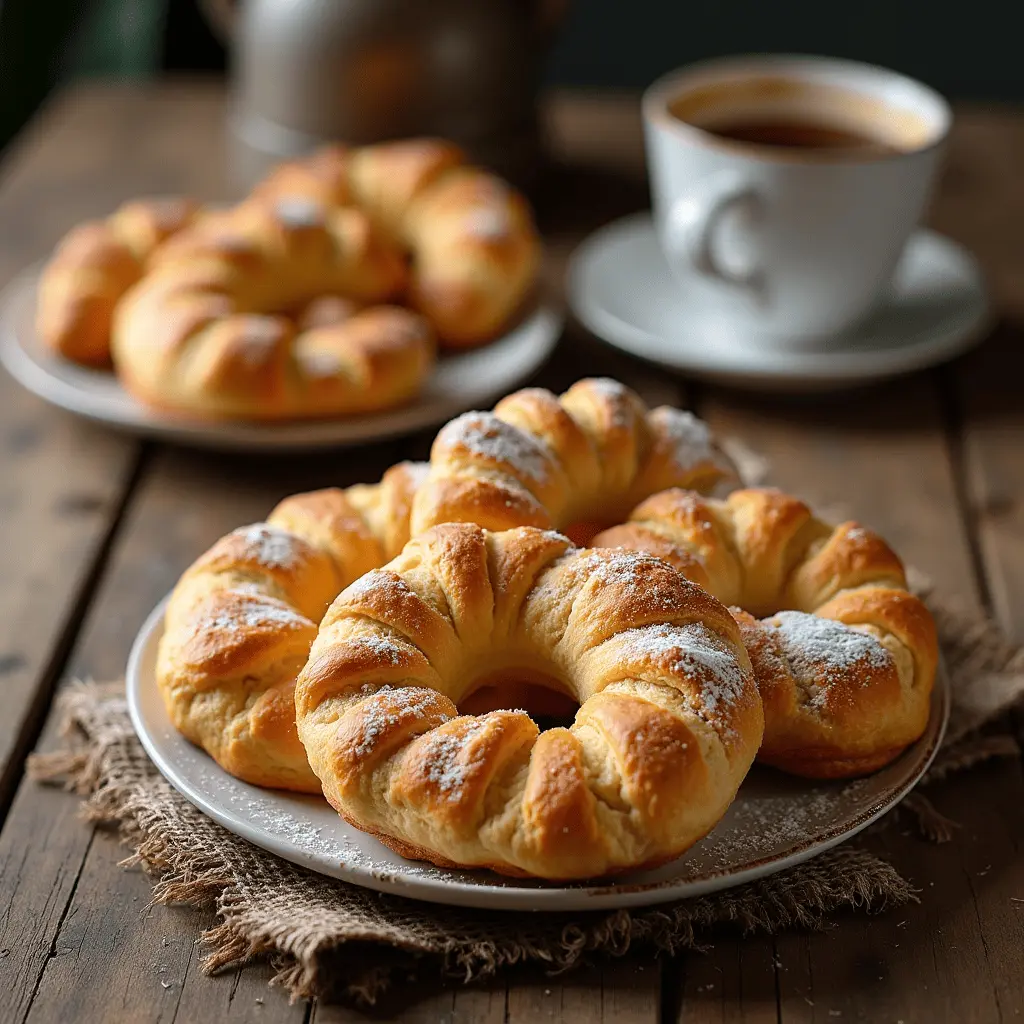
Freshly baked Gipfeli Recipe

Imagine waking up on a crisp morning, the scent of freshly baked pastries wafting through the air, instantly lifting your spirits. There’s something deeply comforting about the flaky layers of a perfectly baked Gipfeli, a Swiss delicacy that transforms breakfast into a moment of pure joy. Whether you’ve experienced the bustling charm of Swiss bakeries or are simply seeking to recreate a cozy European tradition in your kitchen, learning how to make a Gipfeli recipe opens the door to this indulgent experience.
For many, the art of baking isn’t just about the end result it’s about the memories created along the way. Picture yourself rolling out soft dough, feeling the buttery layers come together, and folding the crescents into their classic shapes, each step building anticipation for the first warm, golden bite. This isn’t just another recipe; it’s an invitation to slow down, connect with culinary traditions, and share something special with those you love.
If you’ve ever been captivated by the elegance of Swiss pastries or dreamed of recreating that bakery-quality magic at home, this guide will walk you through the process step-by-step. From mixing the dough to mastering the folds, you’ll learn how to craft Gipfeli that are not only delicious but also a testament to your skills in the kitchen. Ready to start your journey to Swiss pastry perfection? Let’s dive into the Gipfeli recipe together and make this cherished tradition your own.

Swiss Gipfeli recipe
Ingredients
Method
- Mix dry ingredients: In a large bowl whisk together flour, salt, sugar and instant yeast (keep salt away from direct contact with yeast when combining).
- Make dough: Warm the milk to about 30–35°C (lukewarm). Mix milk, egg, and softened 60 g butter. Add wet ingredients to dry ingredients and knead 6–8 minutes until smooth and elastic. Form into a ball.
- First rest (bulk chill): Cover and chill the dough 30–45 minutes in the fridge dough should firm up but not be rock hard.
- Prepare butter block: While dough chills, shape the cold 200–250 g butter into a flat rectangular block (roughly 15×20 cm) by pounding and folding between parchment until even and pliable but still cold. Keep chilled.
- Roll dough & encase butter: Roll chilled dough into a rectangle about twice the size of your butter block. Place butter block centrally and fold the dough over to fully encase the butter (sealed packet). Chill 15–30 minutes if butter softens.
- Lamination turns: Roll the dough-butter package into a long rectangle about 60×20 cm. Perform a single letter fold (fold one third, then the other third over a “single turn”). Chill 20–30 minutes. Repeat rolling and single turn 2 more times (total 3 single turns), chilling 20–30 minutes between turns. Keep dough cold but pliable.
- Final roll & shape: After final chill, roll dough into a rectangle ~30×40 cm, thickness ~3–4 mm. Trim edges, cut into 12 equal triangles. Starting from the base of each triangle, roll toward the tip to form a crescent shape (stretch slightly while rolling for a tight crescent). Place on baking trays lined with parchment.
- Proof: Cover loosely and proof at cool room temperature (or in a slightly warm place ~24°C) until nearly doubled about 60–90 minutes depending on temperature.
- Egg wash & bake: Preheat oven to 200°C (390°F). Brush each gipfeli with egg wash. Bake for 12–16 minutes until deep golden and well risen. Rotate tray once for even coloring.
- Cool: Remove to a wire rack and cool 10–15 minutes before serving. If desired, dust lightly with powdered sugar or brush with apricot glaze.
What Is Gipfeli Recpes?
If you’ve ever strolled through a charming Swiss bakery or sat down for breakfast in the Alps, chances are you’ve encountered the Gipfeli. This delightful pastry, a staple of Swiss cuisine, resembles a croissant in appearance but brings its own unique flair to the table. Crafted with a delicate balance of buttery layers and a slightly denser texture, the Gipfeli offers a comforting experience that is both familiar and distinct. Its iconic crescent shape and golden exterior make it a visual and culinary treat, perfect for starting your day or enjoying as a snack.

Unlike the rich, buttery French croissant, the Gipfeli leans toward a subtler flavor profile, often incorporating just enough sweetness to complement your favorite spreads or a steaming cup of coffee. The texture, though still flaky, is sturdier, making it a versatile pastry that holds up well to various fillings like fruit jams, honey, or even savory options like cheese.
This guide to the Gipfeli recipe will not only teach you how to replicate this Swiss classic but also give you insight into the culture and tradition that make it so special. Whether you’re a seasoned baker or trying your hand at pastries for the first time, the step-by-step instructions ahead will ensure your Gipfeli turn out bakery-worthy.
Why Try Making Gipfeli at Home?
- Celebrate Swiss Tradition: Bring a slice of Switzerland into your kitchen and enjoy an authentic taste of Alpine cuisine.
- Customizable Creations: Experiment with sweet or savory variations to suit your preferences.
- A Rewarding Experience: Mastering the Gipfeli recipe is not only a fun challenge but also an opportunity to create something truly special to share with friends and family.
Ready to embrace the art of baking and bring the magic of Switzerland into your home? Follow along as we explore the ingredients, techniques, and tips for perfecting your very own Gipfeli recipe.
This section delivers valuable information in a conversational and engaging tone while naturally incorporating the focus keyword. The added bullet points and call-to-action enhance readability and encourage readers to continue. Let me know if you’d like further revisions!
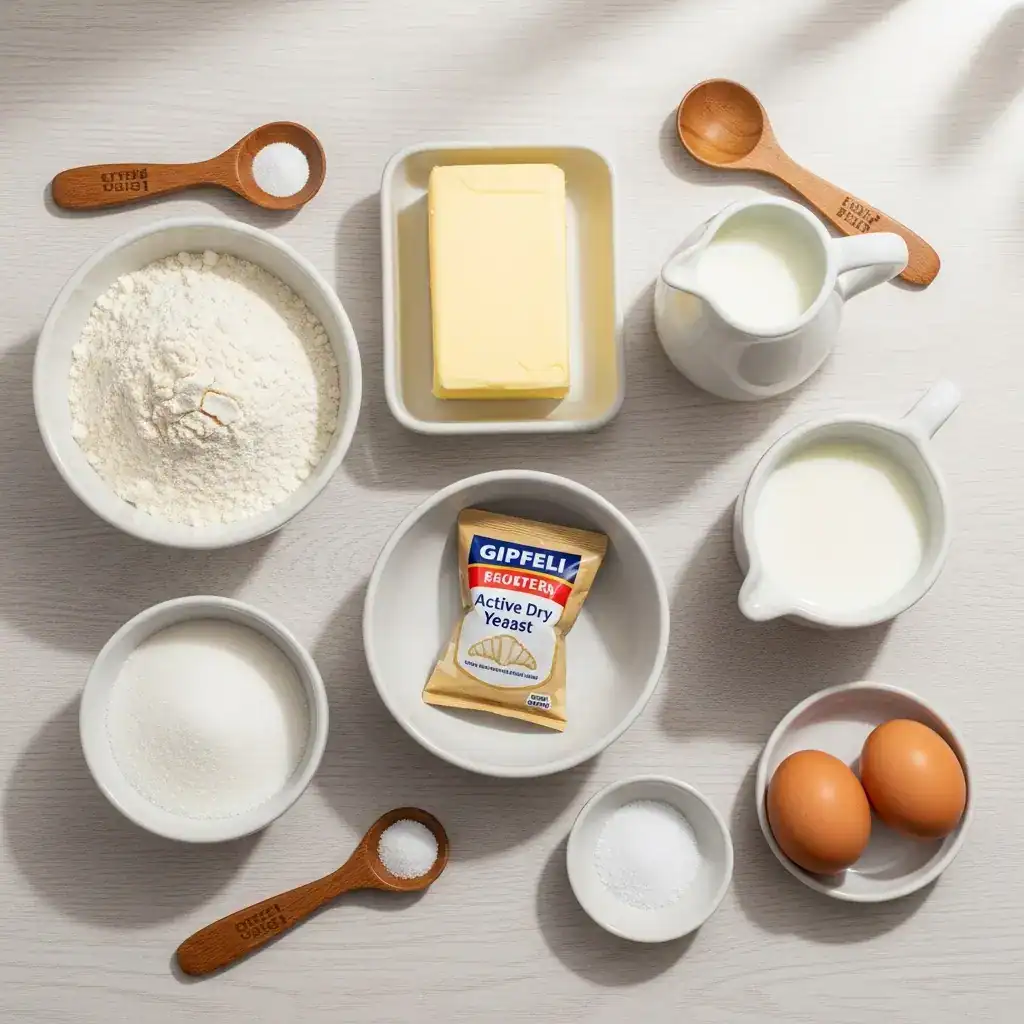
Ingredients for Gipfeli Recipe
To create the perfect Gipfeli, having the right ingredients is essential. Each component plays a vital role in achieving the pastry’s signature flaky texture, golden color, and delicious flavor. Below, you’ll find a detailed table outlining what you need for this Gipfeli recipe, along with tips to ensure the best results.
| Ingredient | Quantity | Why It’s Important |
|---|---|---|
| All-purpose flour | 4 cups (500 g) | Forms the base of the dough, providing structure. |
| Unsalted butter | 1 cup (225 g) | Creates the flaky layers essential to a Gipfeli. |
| Milk | 1 cup (240 ml) | Adds moisture and activates the yeast. |
| Active dry yeast | 2 tsp | Helps the dough rise, giving the pastry its lightness. |
| Sugar | 2 tbsp | Adds a touch of sweetness and aids browning. |
| Salt | 1 tsp | Balances the flavors and enhances the taste. |
| Egg | 1, beaten | Used for brushing the pastry, providing a golden, glossy finish. |
Choosing the Right Ingredients
- High-Quality Butter: Since butter is a key ingredient, using high-quality, unsalted butter ensures rich flavor and the flakiness that defines a great Gipfeli.
- Fresh Yeast: Make sure your yeast is fresh and active to achieve the proper rise. If in doubt, test it by mixing with a bit of warm water and sugar before using.
- Milk Temperature: The milk should be lukewarm, around 100°F (38°C), to activate the yeast without killing it.
Tips for Ingredient Preparation
- Chill the Butter: Cold butter is crucial for creating the layered texture. Keep it in the fridge until it’s time to laminate the dough.
- Measure Accurately: Weighing your ingredients ensures consistency and better results.
- Room Temperature Eggs: Let your egg warm up slightly before brushing the pastry; this helps with even coating.
By following this guide and preparing your ingredients with care, you’ll be ready to dive into the steps of crafting an authentic Gipfeli recipe. Ready to see how these components come together to create magic? Let’s move to the step-by-step instructions and bring your pastry dreams to life!
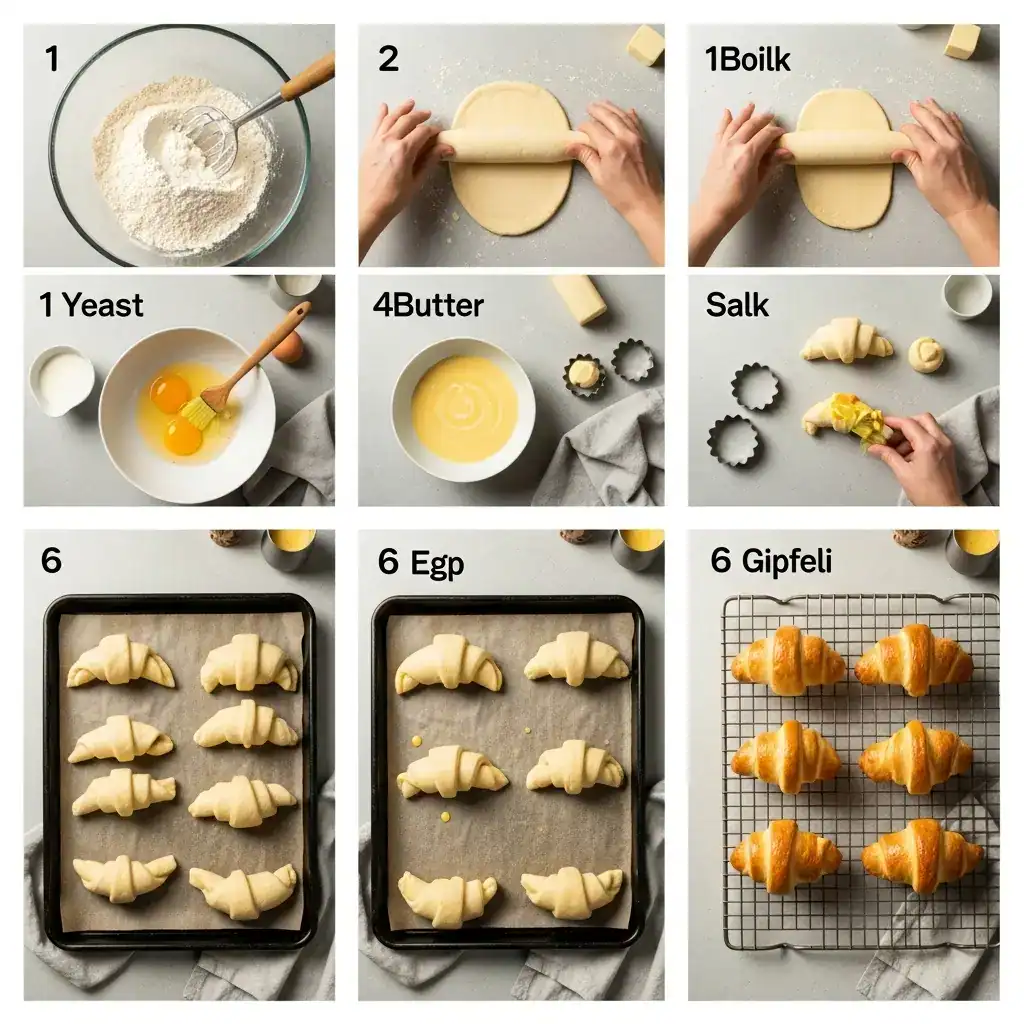
Step-by-Step Guide to Making Gipfeli Recipe
Mastering the Gipfeli recipe may seem like a challenge, but with the right approach, you can create this Swiss pastry with ease. By breaking the process into clear, manageable steps, you’ll learn how to achieve the perfect balance of buttery layers, golden color, and that distinctive crescent shape. Let’s dive into each stage to ensure your Gipfeli turn out bakery-worthy!
Step 1: Preparing the Dough
The foundation of any great Gipfeli starts with a well-prepared dough.
- Activate the Yeast: In a small bowl, mix lukewarm milk with sugar and sprinkle in the yeast. Let it sit for 5–10 minutes until it becomes frothy.
- Combine Ingredients: In a large mixing bowl, combine flour and salt. Slowly incorporate the yeast mixture and knead until the dough becomes smooth and elastic.
- First Rest: Cover the dough with a damp cloth and let it rise for 1–2 hours in a warm place until it doubles in size.
Pro Tip: Avoid over-kneading, as this can make the dough tough and less pliable for layering.
Step 2: Laminating the Dough
Laminating is where the magic happens, creating those iconic flaky layers.
- Prepare the Butter: Roll out chilled butter between two sheets of parchment paper until it forms a thin rectangle.
- Incorporate the Butter: Roll the dough into a larger rectangle and place the butter on one half. Fold the other half over to encase the butter completely.
- Fold and Chill: Roll out the dough, fold it into thirds (like folding a letter), and refrigerate for 30 minutes. Repeat this process 2–3 more times to build the layers.
Pro Tip: Keep the dough cold throughout the process to prevent the butter from melting into it.
Step 3: Shaping the Gipfeli
This step brings the classic crescent shape to life.
- Cut the Dough: Roll out the laminated dough into a large rectangle about 1/4 inch thick. Using a sharp knife or pastry cutter, divide the dough into triangles.
- Roll into Crescents: Starting at the wide base of each triangle, roll tightly toward the tip. Curve the ends slightly to form a crescent shape.
- Final Rest: Place the shaped Gipfeli on a baking tray lined with parchment paper, cover lightly, and let them rise for another 30–45 minutes.
Pro Tip: For uniform shapes, use a ruler to measure and cut consistent triangles.
Step 4: Baking the Gipfeli
The final step is where all your hard work pays off.
- Brush and Bake: Preheat your oven to 375°F (190°C). Brush the Gipfeli with a beaten egg to give them a glossy, golden finish. Bake for 15–20 minutes or until puffed and golden brown.
- Cool Slightly: Allow them to cool on a wire rack for a few minutes before serving.
Ready to Try It Yourself?
Now that you’ve mastered the steps, it’s time to bring this Gipfeli recipe to life in your kitchen. Whether you enjoy them with jam, honey, or simply as they are, these pastries are sure to impress. Share your baking experience and let us know your favorite Gipfeli variations in the comments below!
This step-by-step guide uses clear subheadings, bullet points, and tips to make the process approachable. The focus keyword is woven naturally into the content, enhancing its SEO value while keeping the tone engaging and reader-focused. Let me know if you need further adjustments!
Tips and Tricks for the Perfect Gipfeli Recipe
Crafting the ideal Gipfeli recipe takes a blend of patience, skill, and a few insider secrets. These tips and tricks will help you achieve bakery-quality results every time, ensuring your pastries are flaky, golden, and irresistible.
1. Use High-Quality Ingredients
The foundation of any great Gipfeli lies in the ingredients you choose.
- Butter: Opt for unsalted, high-fat butter, as it creates those flaky layers essential to the pastry’s texture. European-style butter is an excellent choice for its rich flavor and higher fat content.
- Flour: All-purpose flour works well, but for an even lighter texture, you can mix in a bit of pastry flour.
- Fresh Yeast: Always check the freshness of your yeast. If it doesn’t foam during activation, it won’t help your dough rise properly.
2. Master the Dough-Laminating Process
Laminating the dough the process of folding and rolling butter into it is the secret behind Gipfeli’s signature flakiness.
- Keep Everything Cold: Chilled butter and dough are crucial to creating distinct layers. If the butter softens too much, refrigerate the dough for 10–15 minutes between folds.
- Don’t Overwork the Dough: Rolling too aggressively can break the layers. Gentle, even pressure is key to maintaining their integrity.
- Fold Consistently: Aim for at least three folds to create enough layers without making the pastry too dense.
3. Shape with Precision
The crescent shape is iconic, but achieving it takes some practice.
- Even Triangles: Use a ruler to measure and cut uniform triangles, ensuring all your Gipfeli bake evenly.
- Tight Rolling: When shaping the crescents, roll each triangle snugly but not too tightly, allowing room for the dough to expand during baking.
- Seal the Tip: Press the tip of the triangle firmly to the pastry to keep it from unrolling in the oven.
4. Perfect the Bake
A well-baked Gipfeli has a golden exterior and a soft, airy interior.
- Egg Wash for Shine: Brushing the pastry with a beaten egg gives it that glossy, professional finish.
- Preheat Your Oven: Ensure the oven is fully preheated to 375°F (190°C) before baking to encourage even cooking and puffing.
- Watch the Time: Bake for 15–20 minutes, but keep an eye on the color. Gipfeli should be golden, not overly browned.
Your Path to Perfect Gipfeli
By following these tips, you’ll not only elevate your baking skills but also ensure your Gipfeli recipe is a surefire success. Ready to put these tricks into action? Grab your ingredients, roll up your sleeves, and enjoy the satisfaction of creating this classic Swiss pastry right at home.
Conclusion:
When you follow the Gipfeli recipe step by step, you’re not just baking a pastry you’re bringing a piece of Swiss culture into your home. This beloved treat, known for its flaky, buttery texture and delicate crescent shape, embodies the essence of Swiss baking. With every bite, you’ll experience the satisfaction of crafting something from scratch, using ingredients that come together to create a truly delightful pastry.
Why You’ll Love Making Gipfeli
There’s something magical about baking Gipfeli the smell of freshly baked dough, the joy of watching it rise, and the reward of biting into a warm, buttery pastry. Whether you enjoy them with a cup of coffee or as a sweet treat for breakfast, these pastries are perfect for any occasion. You can personalize your Gipfeli recipe by adding your favorite fillings, experimenting with flavors, or keeping them simple and classic.
Ready to Try Your Own Gipfeli Recipe?
Now that you have the tips, tricks, and knowledge to make Gipfeli like a pro, it’s time to gather your ingredients and get started. Whether you’re baking for a special event, a holiday breakfast, or simply to enjoy with loved ones, you can feel confident knowing you’ve mastered this Swiss classic.
We’d love to see how your Gipfeli turn out! Don’t forget to share your creations in the comments or tag us on social media. If you have any questions or would like to share your own tips, feel free to reach out let’s keep the conversation going!
FAQs About Gipfeli Recipe
Baking Gipfeli can be a delightful experience, but you may have a few questions along the way. To help ensure you achieve the perfect result, we’ve gathered answers to some of the most common questions about this beloved Swiss pastry.
1. Can I Use a Different Type of Flour for the Gipfeli Recipe?
Yes, you can experiment with different types of flour. While all-purpose flour is the most common choice for a Gipfeli recipe, you can mix in a bit of pastry flour for a lighter, more delicate texture. Some people also prefer using bread flour to give the pastry a slightly chewier bite, but be aware this may change the flakiness.
2. How Can I Ensure My Gipfeli Are Extra Flaky?
To get those signature layers, the key is in the dough-laminating process. Make sure your butter and dough are chilled throughout the folding steps to prevent the butter from melting into the dough. Additionally, avoid overworking the dough gentle folding and rolling will preserve the delicate layers needed for that flaky texture you’re aiming for.
3. Can I Make the Gipfeli Dough in Advance?
Absolutely! You can prepare the dough the night before and store it in the fridge for up to 24 hours. This will actually help develop the flavor further. Just remember to let the dough rest and come to room temperature before rolling it out and shaping it into crescents.
Ready to bake? Share your results in the comments below, or let us know if you have any more questions as you perfect your Gipfeli recipe!
Are You Try This Recipe ?
There are no reviews yet. Be the first one to write one.
