
How to Make Mini Key Lime Pies That Wow Every Time
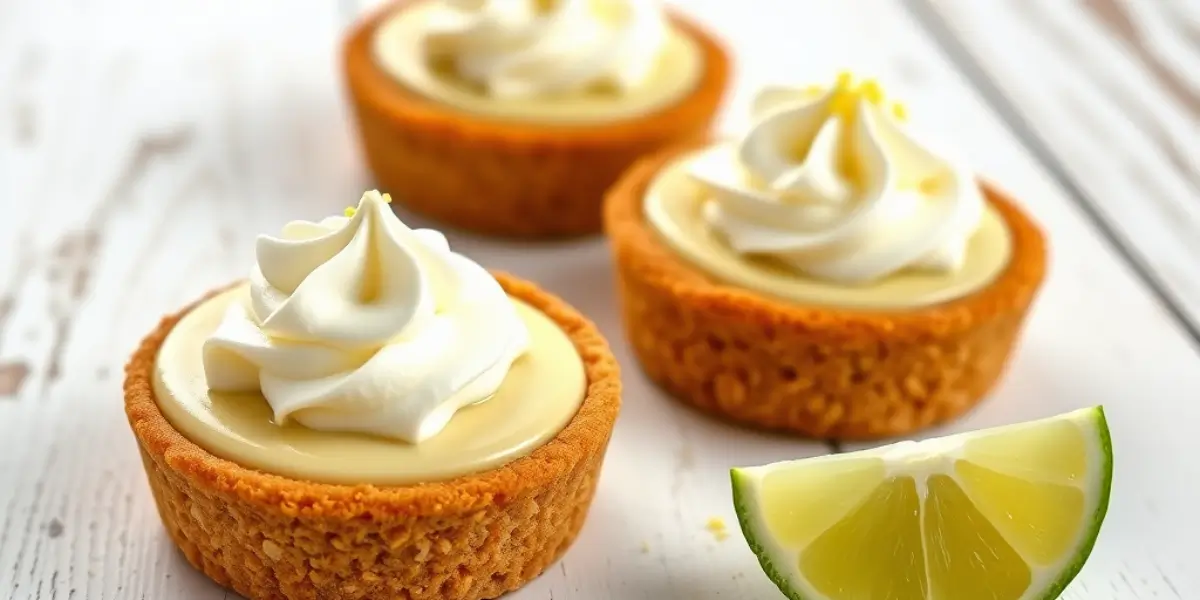
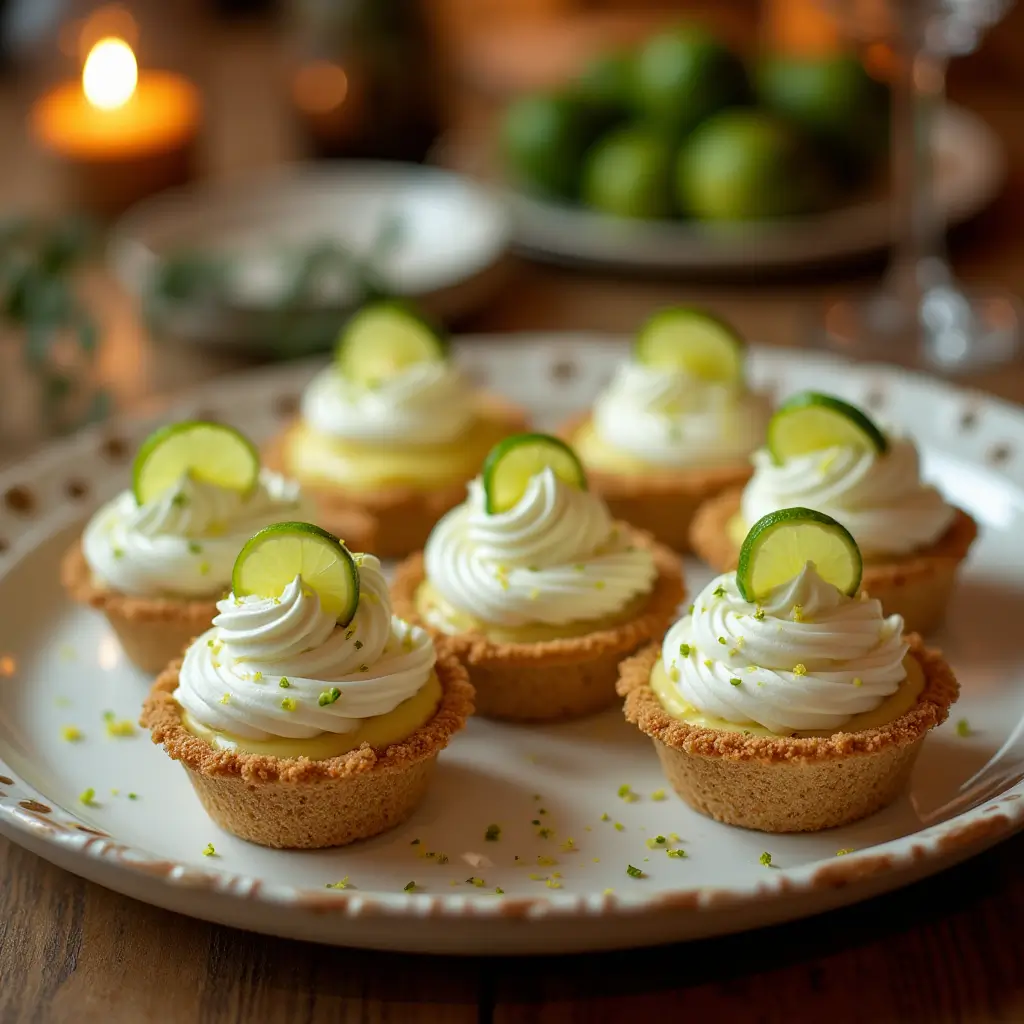
Remember that first bite of key lime pie? That burst of tangy citrus balanced perfectly with sweet creaminess, all nestled in a buttery crust? It tastes like sunshine and vacation, instantly transporting you to warmer climes and relaxed afternoons. Now, imagine capturing that same magic in perfectly portioned, utterly adorable individual treats. That’s the pure joy of Mini Key Lime Pies – delightful servings of happiness that are surprisingly easy to make and absolutely impossible to resist.
Maybe you’re planning a summer BBQ, a fancy dinner party, or simply craving a special dessert that doesn’t require committing to a whole pie. Whatever the occasion, these little gems deliver big flavour. They offer all the classic appeal of their full-sized counterpart but with added charm and convenience. Get ready to dive into the ultimate guide, where we’ll unlock all the secrets to baking the most perfect, tangy, sweet Mini Key Lime Pies you’ve ever tasted.
Why Mini Key Lime Pies Are the Perfect Bite-Sized Dessert
Before we roll up our sleeves and get baking, let’s talk about why going mini is often the mighty choice when it comes to key lime pie. It’s not just about cuteness (though they are incredibly cute!).
- Effortless Portion Control & Elegant Presentation
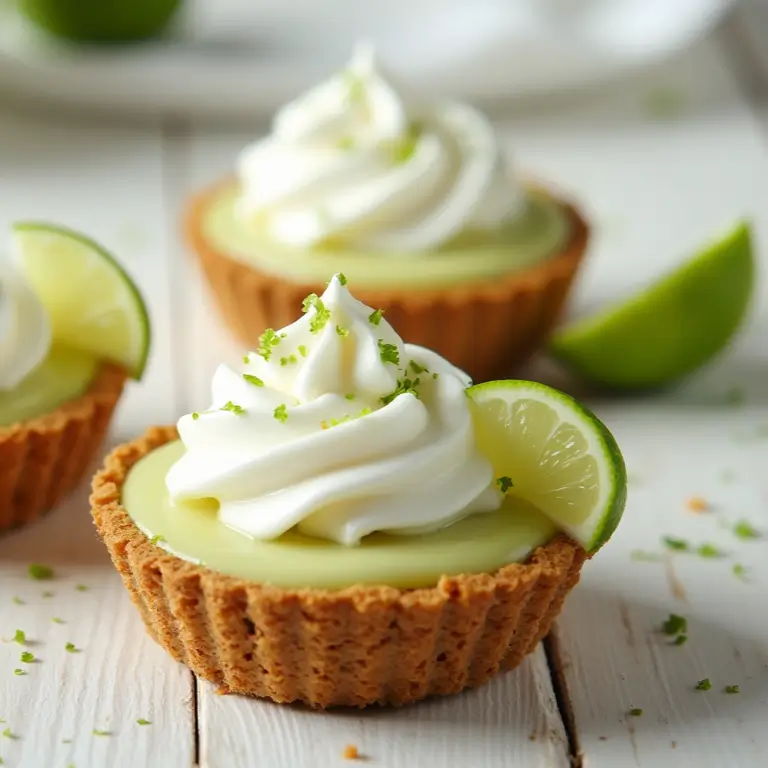
There’s something inherently elegant about individual desserts. Each mini pie is a self-contained masterpiece, perfectly portioned so everyone gets just the right amount. No messy slicing, no arguing over who got the bigger piece – just neat, tidy, and visually appealing treats that look stunning on a dessert table. They make serving a breeze and feel a little more special than a slice from a larger pie. - Ideal for Parties, Picnics, and Gatherings
Miniaturized food is party gold! Mini Key Lime Pies are incredibly portable and easy for guests to handle. They don’t require plates or forks (though a small fork is nice!), making them perfect for mingling, outdoor events like picnics, or buffet-style setups. Their individual nature also makes them feel safer and more hygienic for sharing in group settings. - Quicker to Bake & Chill Than a Full-Sized Pie
Let’s be honest, sometimes we want that key lime goodness without the long wait. Smaller pies mean significantly reduced baking and chilling times compared to a standard 9-inch pie. The filling sets faster, and the crusts bake more quickly. This means you can satisfy your craving or prep for a party in less time – a definite win!
Mastering the Magic: Essential Components for Irresistible Mini Key Lime Pies
Creating the perfect mini key lime pie comes down to nailing three key elements: the crust, the filling, and the topping. Let’s break down each one.
- The Foundation: Crafting the Perfect Graham Cracker Crust
The crust is the essential base that holds everything together. A classic graham cracker crust offers a slightly sweet, buttery, and crumbly counterpoint to the tart filling.- The Crumbs: Start with finely crushed graham crackers. You can buy crumbs or pulse whole crackers in a food processor until they resemble coarse sand.
- The Binder: Melted butter is key for holding the crumbs together and adding richness. Don’t skimp here!
- The Sweetness: A touch of granulated sugar enhances the flavour and aids in crisping.
- The Press: Press the mixture firmly and evenly into the bottom and slightly up the sides of your muffin tin liners or mini tart pans. Pre-baking the crusts for a few minutes before adding the filling is highly recommended to prevent a soggy bottom – more on that later!
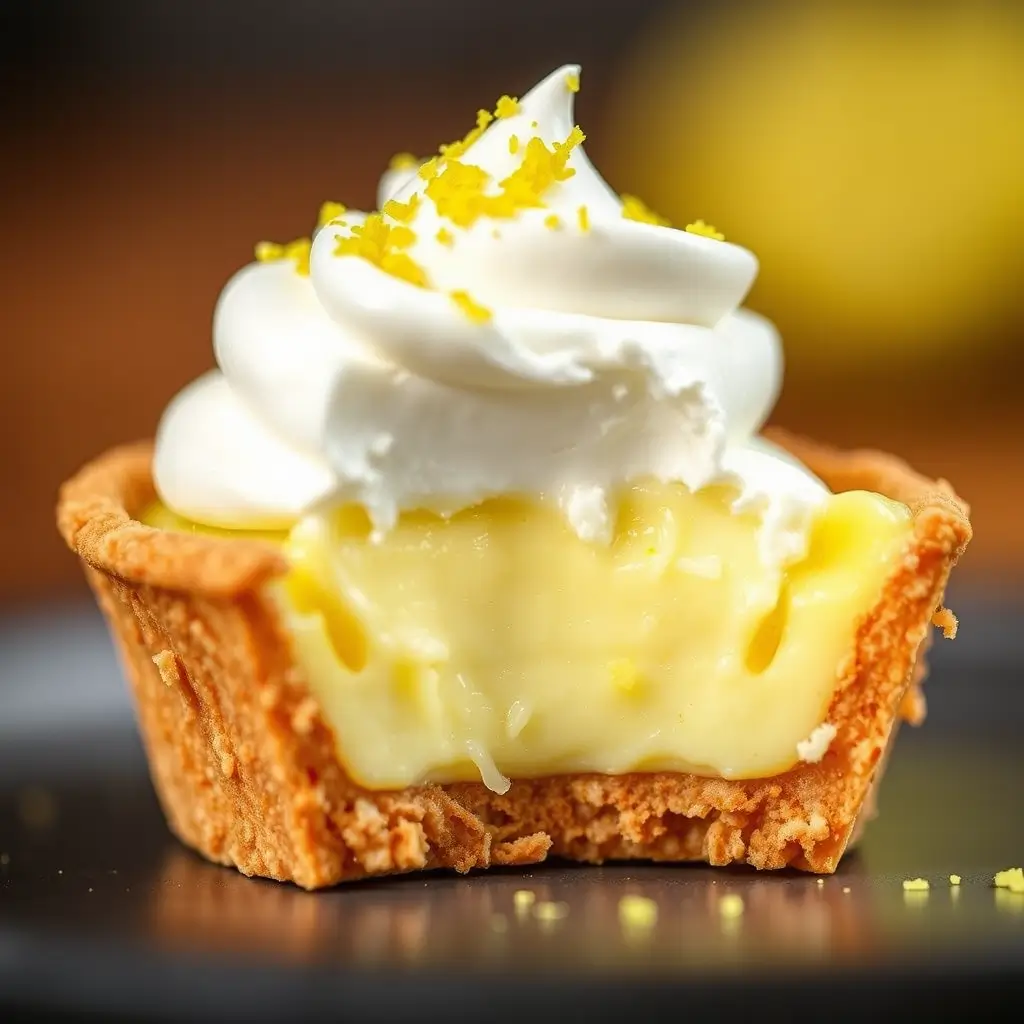
- The Star: Achieving That Signature Tangy & Creamy Key Lime Filling
This is where the magic truly happens. The filling should be a luscious balance of tart and sweet, with a smooth, creamy texture that holds its shape.- The Lime Juice: Authenticity calls for Key lime juice. Key limes (Citrus aurantiifolia) are smaller, more aromatic, and have a distinctively intense tartness compared to common Persian limes. If you can find fresh Key limes, fantastic! If not, high-quality bottled Key lime juice (like Nellie & Joe’s) is a widely accepted and excellent substitute. Do not substitute regular lime juice – the flavour profile will be different.
- The Sweetener: Sweetened condensed milk is the non-negotiable secret weapon. Its thick, syrupy consistency reacts chemically with the acidic lime juice to thicken the filling (partially even before baking). It also provides the necessary sweetness to balance the tart limes.
- The Enrichment: Egg yolks add richness, colour, and help the filling set firmly during baking. Make sure they are well incorporated for a smooth texture.
- The Crown: Choosing Your Topping – Whipped Cream vs. Meringue
The final flourish! Both whipped cream and meringue are traditional toppings, each offering a different experience.- Whipped Cream: Light, airy, and cool, sweetened whipped cream provides a lovely contrast to the tart filling. It’s easy to make (heavy cream, powdered sugar, vanilla extract) and dollop or pipe onto the chilled pies just before serving. For stability, you can add a little cream cheese or unflavored gelatin.
- Meringue: A classic pairing, especially in the Florida Keys tradition. A fluffy, toasted meringue topping adds sweetness and a beautiful visual appeal. It involves whipping egg whites with sugar until stiff peaks form, piling it onto the baked and slightly cooled pies, and then briefly baking or torching until golden brown. Note: Meringue is best enjoyed the day it’s made.
Your Step-by-Step Recipe for Delicious Mini Key Lime Pies
Ready to bake? Here’s a reliable recipe to get you started. This recipe typically yields 12 standard-sized muffin tin pies.
Table 1: Mini Key Lime Pie Ingredients
| Component | Ingredient | Quantity | Notes |
| Crust | Graham Cracker Crumbs | 1 ½ Cups | Approx. 10-12 full cracker sheets |
| Granulated Sugar | ¼ Cup | ||
| Unsalted Butter, Melted | 6 Tablespoons (¾ stick) | ||
| Filling | Egg Yolks | 3 Large | Save whites for meringue, if using |
| Sweetened Condensed Milk | 1 Can (14 oz) | Use full-fat for best texture | |
| Key Lime Juice | ½ Cup | Fresh squeezed or quality bottled | |
| Lime Zest (Optional) | 1 Teaspoon | From Key limes or regular limes for aroma | |
| Topping | Heavy Whipping Cream | 1 Cup | For whipped cream topping |
| (Choose One) | Powdered Sugar | 2-4 Tablespoons | To taste, for whipped cream |
| Vanilla Extract | ½ Teaspoon | For whipped cream | |
| OR Egg Whites | 3 Large | For meringue topping | |
| OR Granulated Sugar | 6 Tablespoons | For meringue topping | |
| OR Cream of Tartar | ¼ Teaspoon | Stabilizer for meringue | |
| Garnish | Lime Slices or Zest | Optional | |
| Toasted Coconut Flakes | Optional |
Equipment: Standard 12-cup muffin tin, paper or foil liners, mixing bowls, whisk, spatula.
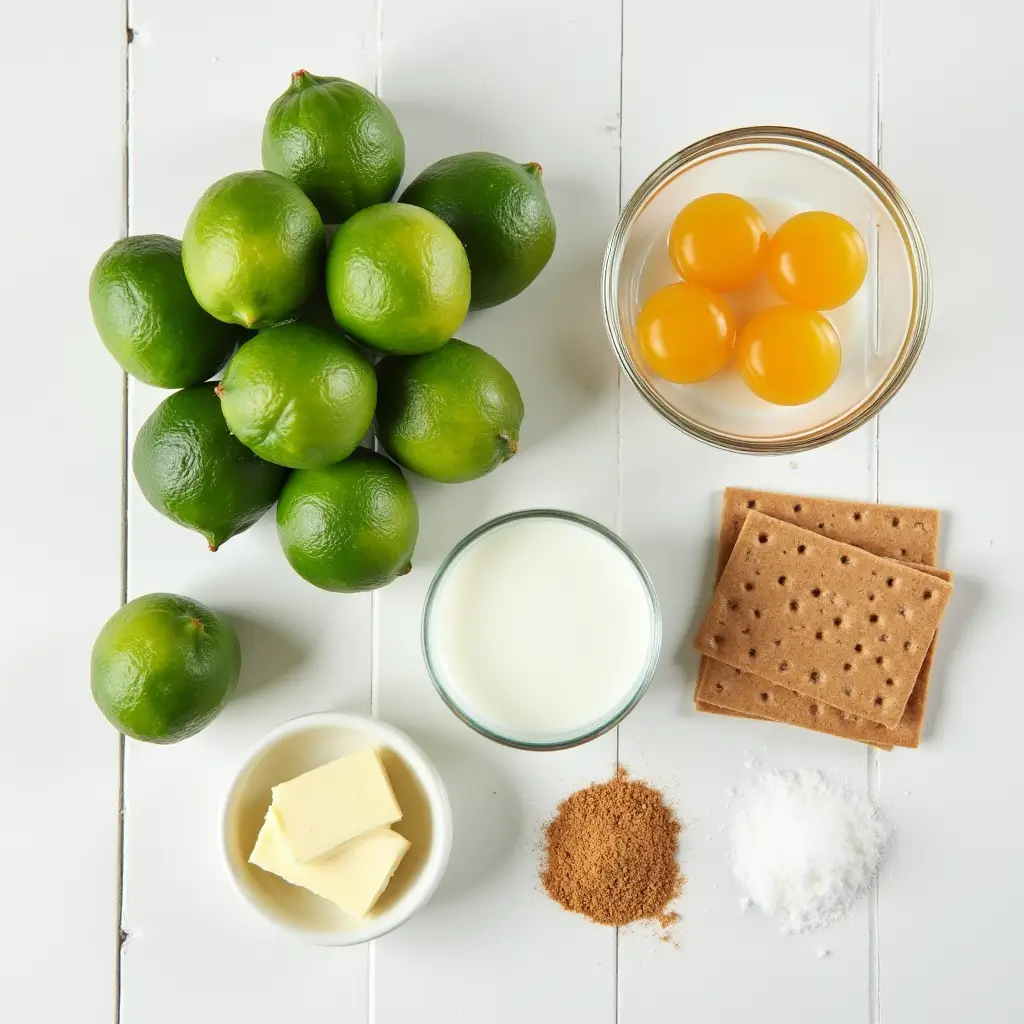
Table 2: Step-by-Step Instructions Summary
| Step | Action | Details |
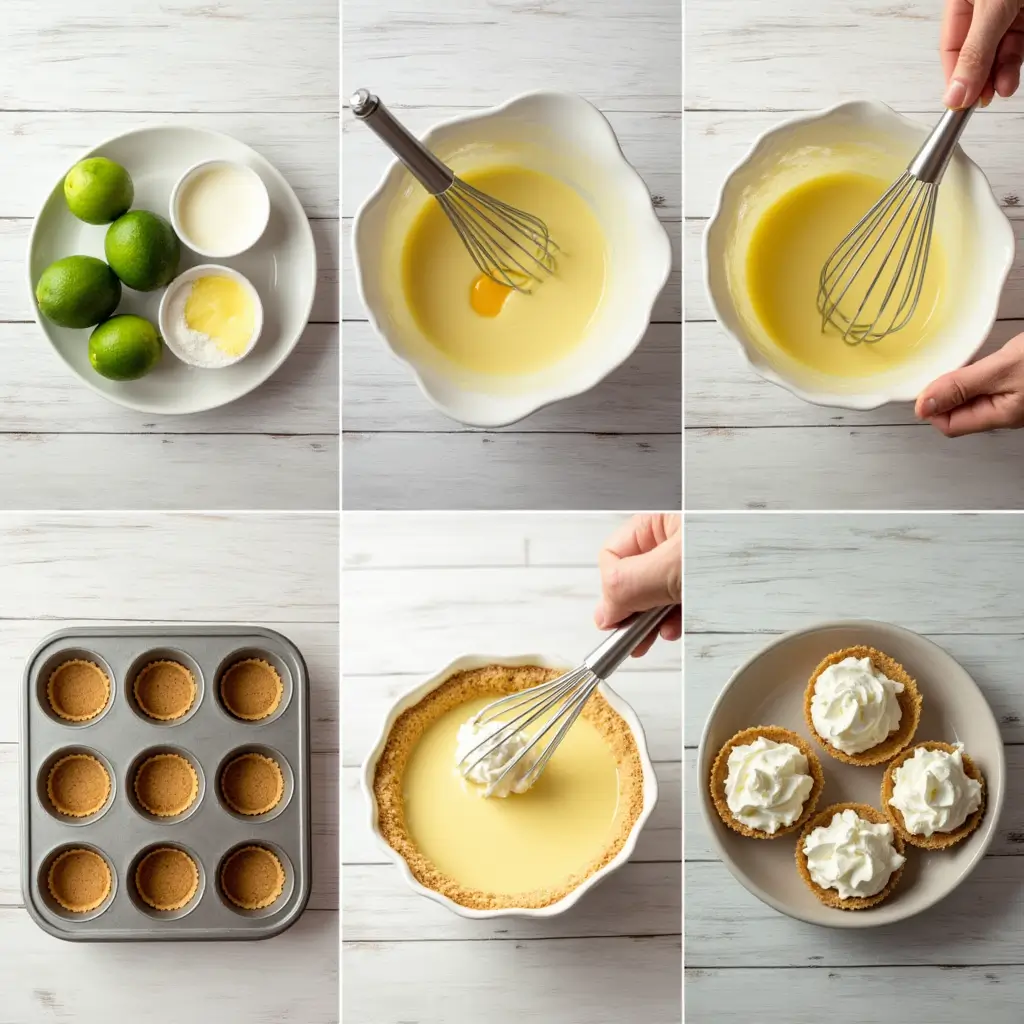
| 1 | Preheat & Prep: | Preheat oven to 350°F (175°C). Line muffin tin with liners. |
| 2 | Make Crust: | Combine graham cracker crumbs, ¼ cup sugar, and melted butter. Mix well. |
| 3 | Press & Pre-bake Crust: | Press ~1.5 tbsp crust mixture into each liner bottom. Bake for 5-7 minutes until lightly golden. Cool slightly. |
| 4 | Make Filling: | Whisk egg yolks in a medium bowl. Whisk in condensed milk until smooth. |
| 5 | Add Lime: | Gradually whisk in Key lime juice (and zest, if using) until fully combined and slightly thickened. |
| 6 | Fill Crusts: | Pour filling evenly over pre-baked crusts, nearly to the top of the liner. |
| 7 | Bake Pies: | Bake for 12-17 minutes, until the filling is set (edges firm, center slightly jiggly). |
| 8 | Cool Completely: | Let pies cool in the muffin tin for 20-30 mins, then transfer to a wire rack to cool completely. |
| 9 | Chill Thoroughly: | Refrigerate pies for at least 3-4 hours (preferably overnight) until well-chilled and fully set. |
| 10 | Add Topping (Just Before Serving): | Whipped Cream: Whip cream, powdered sugar, vanilla until soft peaks. Dollop/pipe onto chilled pies. |
| Meringue: Beat egg whites & cream of tartar. Gradually add sugar, beat to stiff peaks. Top pies, bake/torch. | ||
| 11 | Garnish & Serve: | Add lime zest, slices, or toasted coconut if desired. Serve chilled. |
Pro Tips & Tricks for Flawless Mini Key Lime Pies Every Single Time
Want to elevate your mini pie game from great to absolutely stellar? Keep these tips in mind:
- Avoiding Common Pitfalls (Soggy Bottoms & Runny Centers Be Gone!)
- Soggy Crust Solution: The #1 defense is pre-baking the crust. Those 5-7 minutes in the oven create a slight barrier that helps prevent the liquid filling from soaking in immediately. Ensure you press the crust firmly too.
- Runny Filling Fix: Don’t underbake! The filling needs to set. Look for the edges to be firm and the very center to have just a slight wobble. Overbaking can lead to cracking or a rubbery texture. Proper chilling is also crucial – the filling firms up significantly as it gets cold. Don’t rush the refrigeration step!
- Use Room Temperature Ingredients: While not critical for this recipe, having egg yolks and condensed milk closer to room temperature can sometimes help them incorporate more smoothly.
- Get Creative: Fun Variations and Garnishing Ideas
- Crust Variations: Swap graham crackers for crushed vanilla wafers, shortbread cookies, gingersnaps, or even pretzels for a salty-sweet twist! Add a tablespoon of shredded coconut to the graham cracker crust.
- Filling Add-ins: Swirl in a teaspoon of raspberry puree into each pie before baking for a fruity contrast. Fold in a little coconut cream for a piña colada vibe.
- Garnishes: Beyond lime zest/slices: consider toasted coconut flakes, a sprinkle of sea salt, small edible flowers, white chocolate shavings, or a tiny mint sprig.
- Make-Ahead & Storage Savvy: Serving Your Mini Pies Perfectly
- Make-Ahead: These Mini Key Lime Pies are excellent make-ahead desserts! You can bake the pies (without topping) up to 2 days in advance. Keep them covered loosely with plastic wrap in the refrigerator.
- Topping Timing: Add whipped cream topping just before serving for the best texture. Meringue is also best added and toasted closer to serving time, although it can hold up for a few hours in the fridge.
- Storage: Store leftover pies in an airtight container in the refrigerator for up to 3-4 days. The crust may soften slightly over time. Freezing is possible (without topping) for longer storage, but the texture might change slightly upon thawing. Thaw in the refrigerator.
Conclusion: Your Slice of Sunshine Awaits
There you have it – everything you need to create perfectly portioned, tangy, sweet, and utterly delightful Mini Key Lime Pies. From understanding the essential components to following the step-by-step recipe and incorporating pro tips, you’re now equipped to bake these bite-sized wonders with confidence.
They truly are the perfect dessert solution for so many occasions – easy to serve, visually charming, and bursting with that irresistible key lime flavor. Whether you opt for a cloud of whipped cream or a toasted meringue crown, these mini pies are guaranteed to bring a little sunshine to your table.
Frequently Asked Questions (FAQ)
Q1: What’s the difference between Key Limes and regular limes for Mini Key Lime Pies?
A1: Key limes are smaller, rounder, have thinner skin, more seeds, and a distinctively floral, aromatic, and intensely tart flavor compared to the larger, oval Persian limes commonly found in supermarkets. For authentic Mini Key Lime Pies, using juice specifically from Key limes (fresh or bottled) is crucial for achieving the signature taste profile. Regular lime juice will result in a different, less complex flavor.
Q2: Can I make these Mini Key Lime Pies ahead of time?
A2: Absolutely! Mini Key Lime Pies are great for making ahead. You can prepare and bake the pies (crust and filling) up to 2 days before you plan to serve them. Let them cool completely, then cover loosely with plastic wrap and store them in the refrigerator. Add your desired topping (whipped cream or meringue) shortly before serving for the best results.
Q3: How do I prevent my Mini Key Lime Pie crusts from getting soggy?
A3: The best way to prevent soggy crusts on your Mini Key Lime Pies is to pre-bake the graham cracker crusts for 5-7 minutes before adding the filling. This helps create a seal and sets the crust slightly. Also, ensure your pies are baked until the filling is properly set and always cool and chill them thoroughly before topping and serving, as moisture can migrate if they are still warm.
Ready to bake up some sunshine? Give this Mini Key Lime Pies recipe a try today! We promise they’ll be a hit.
Share your creations! Did you try the recipe? Have any favorite variations or tips? Let us know in the comments below – we love hearing from you!
Are You Try This Recipe ?
There are no reviews yet. Be the first one to write one.
