

Gluten Free Sourdough Bread Recipe _Soft & Delicious!
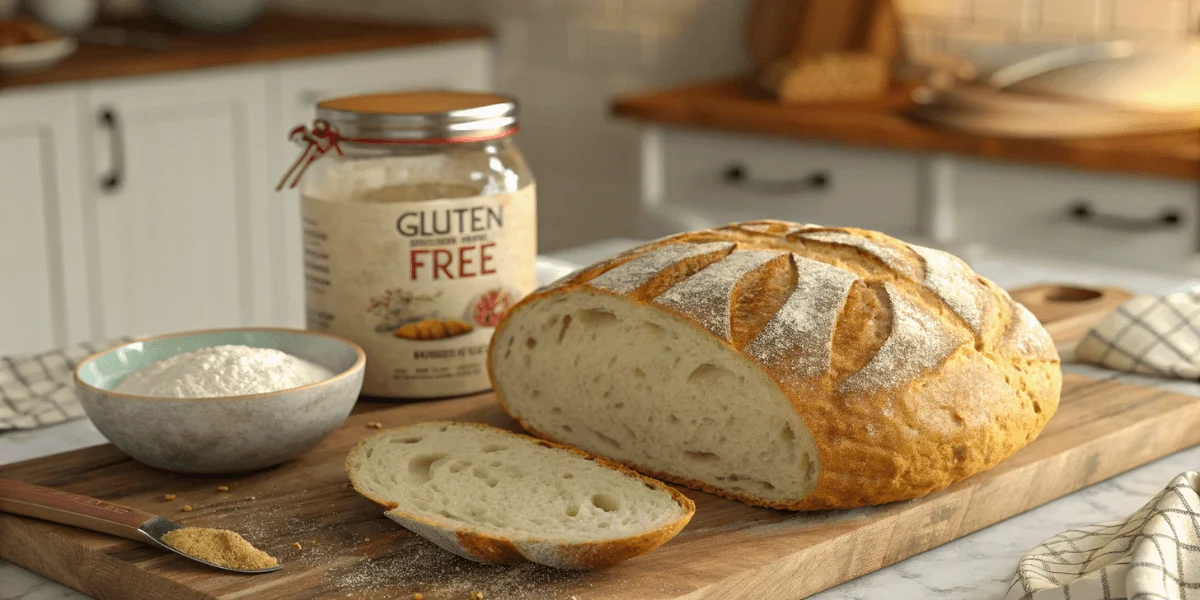
Imagine biting into a warm, freshly baked loaf of gluten free sourdough bread—its crispy crust giving way to a soft, airy interior with just the right amount of tang. If you’ve ever struggled to find a gluten-free bread that isn’t dry, dense, or lacking flavor, you’re not alone. Traditional sourdough has long been praised for its unique taste and gut-friendly benefits, but for those avoiding gluten, finding an equally satisfying alternative can feel impossible. That’s why this gluten free sourdough bread recipe is a game-changer.
Unlike store-bought options that often contain preservatives, artificial ingredients, or an overwhelming list of additives, this homemade version is crafted with wholesome, naturally gluten-free flours. The fermentation process not only enhances the flavor but also makes the bread easier to digest, making it an excellent choice for those with gluten sensitivity or celiac disease. Plus, with the right techniques and ingredients, you can achieve the same chewy texture and delightful tang that make sourdough so special—without a trace of wheat.
Whether you’re new to gluten-free baking or a seasoned home baker, this step-by-step guide will walk you through the entire process, from creating a robust gluten-free sourdough starter to achieving the perfect rise and golden-brown crust. You’ll learn essential tips, troubleshooting solutions, and expert techniques to ensure success every time you bake.

gluten free sourdough bread
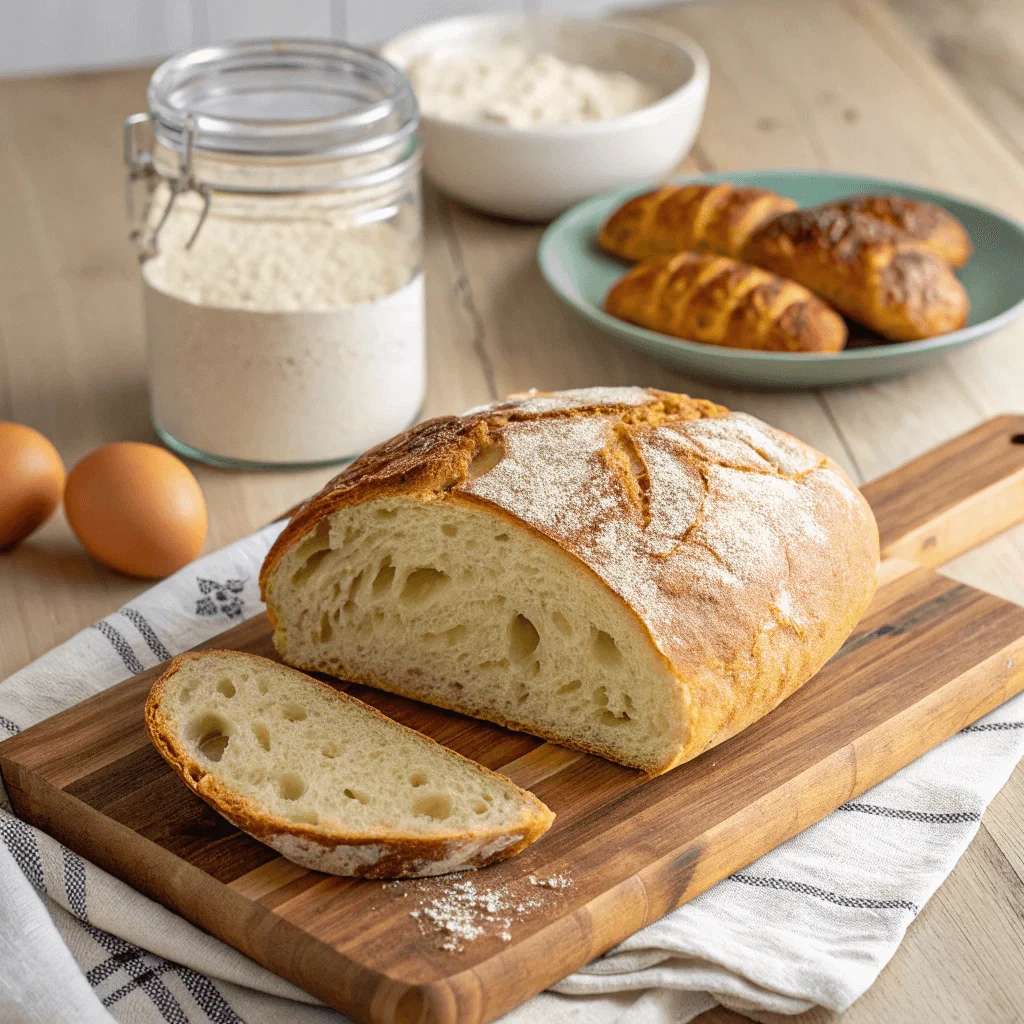
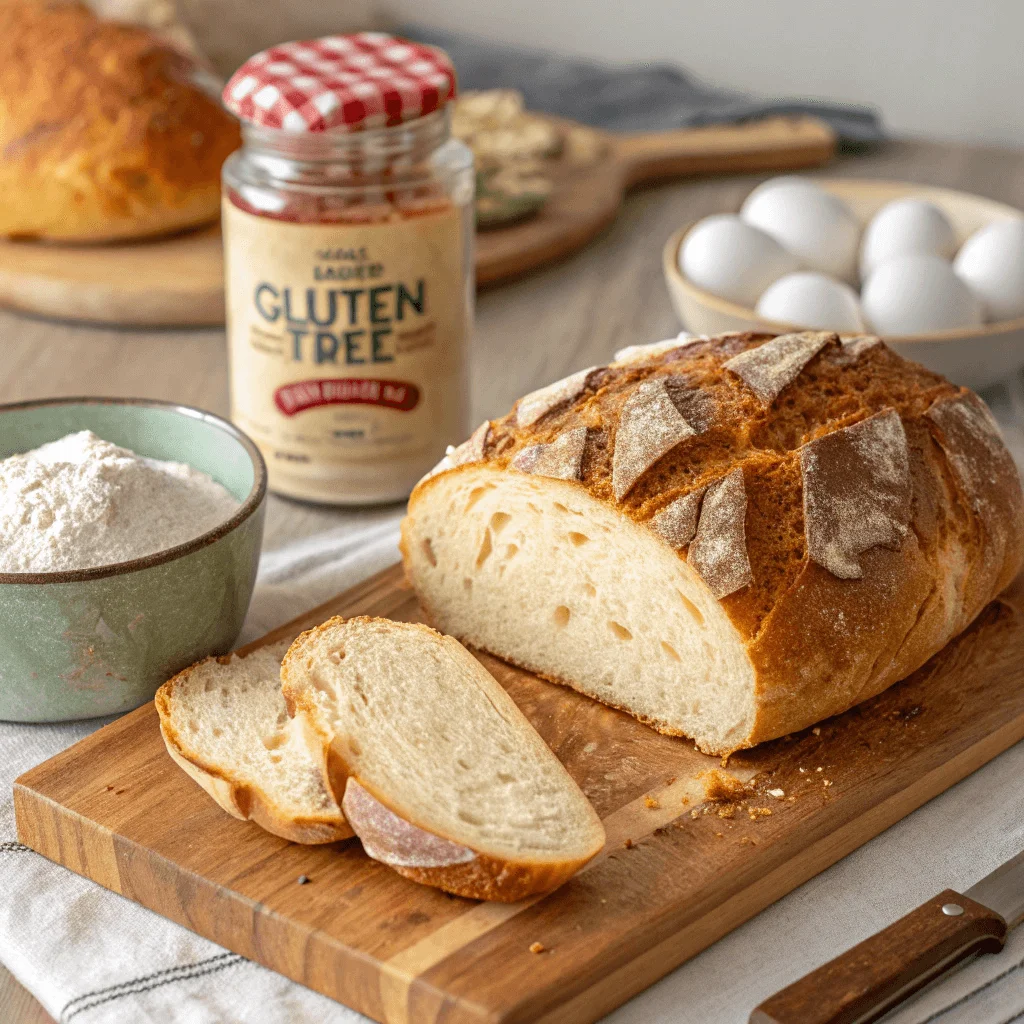
Ingredients
Method
- Whisk together brown rice flour, tapioca starch, potato starch, psyllium husk powder, and salt in a large bowl.
- In a separate bowl, combine the active sourdough starter, warm water, olive oil, honey, and apple cider vinegar.
- Pour wet ingredients into dry ingredients and stir until a thick, sticky dough forms.
- Let the dough rest for 30 minutes to allow the psyllium husk to fully hydrate.
- With wet hands, shape the dough into a round loaf and place on a parchment-lined baking sheet or into a proofing basket dusted with rice flour.
- Cover and ferment at room temperature for 4–8 hours (or refrigerate overnight) until the dough has risen by approximately 50%.
- Preheat oven to 425°F (220°C) with a Dutch oven inside.
- Score the top of the loaf with a sharp blade. Transfer to the hot Dutch oven.
- Bake covered for 30 minutes, then uncover and bake 15–20 minutes more until deeply golden and the internal temperature reaches 205–210°F (96–99°C).
- Cool on a wire rack for at least one hour before slicing.
What Makes Gluten Free Sourdough Bread Special?
When it comes to gluten free sourdough bread, it’s the unique combination of fermentation, carefully selected ingredients, and time-tested techniques that sets it apart from regular gluten-free breads. Unlike other gluten-free loaves that often rely on store-bought yeast or processed ingredients, gluten free sourdough bread uses the natural power of fermentation to create a loaf that’s both flavorful and easy on your digestive system.
The Power of Natural Fermentation
Fermentation is what gives sourdough its signature tangy flavor and chewy texture, but when you switch to a gluten-free version, the magic really happens. As wild yeast and beneficial bacteria interact with the dough, they break down the starches, making the bread easier to digest and improving its nutritional value. The process not only enhances flavor but also reduces the glycemic index, making your gluten free sourdough bread a healthier choice compared to other gluten-free options.
Why Traditional Sourdough Isn’t Gluten-Free
You might be wondering, “Why can’t I simply use a traditional sourdough starter?” The answer lies in the wheat flour. While regular sourdough bread uses wheat flour as its base, which contains gluten, gluten-free sourdough bread requires a blend of gluten-free flours such as rice flour, sorghum flour, or a specially designed gluten-free flour blend. These alternatives mimic the texture and structure of wheat flour without the gluten, providing a lighter, fluffier loaf.
Key Ingredients in Gluten-Free Sourdough Bread
To make a perfect gluten free sourdough bread, it’s essential to choose the right ingredients. Some of the key players in this recipe include:
- Brown rice flour: Adds structure and a mild, slightly nutty flavor.
- Sorghum flour enhances the texture, giving the crumb a soft, tender crumb.
- Psyllium husk: Acts as a binder, giving your bread that chewy, satisfying texture.
- Apple cider vinegar: Helps with the fermentation process and brings a slight tang to balance the bread’s flavor.
By using these ingredients, you’ll achieve a gluten free sourdough bread that’s not only delicious but also packed with nutrients and easy to digest.
What Makes Gluten Free Sourdough Bread Special?
If you’ve been on the hunt for a gluten free sourdough bread recipe that truly delivers, you’re in the right place. Unlike conventional gluten-free bread, which often feels dense or lacks flavor, gluten free sourdough bread offers a completely different experience—one that’s light, tangy, and wonderfully chewy. So, what’s the secret behind this special loaf, and why should you give it a try?
1. Natural Fermentation: The Heart of Sourdough
The magic of gluten free sourdough bread starts with natural fermentation. This process involves wild yeast and beneficial bacteria, which work together to break down the starches and sugars in the dough. Unlike other bread-making methods that use added yeast, sourdough relies on a slow fermentation process, allowing for a deeper, more complex flavor profile. The longer fermentation also makes the bread easier to digest and boosts its nutritional content—ideal for those with gluten sensitivity or looking for a healthier bread option.
2. The Role of Special Gluten-Free Flours
You may wonder why traditional sourdough isn’t gluten-free, and the answer is simple: it’s the flour. Regular sourdough is made with wheat, which contains gluten, a protein that gives the bread structure. But in gluten free sourdough bread, you use a variety of gluten-free flours such as brown rice flour, sorghum flour, and others. These alternative flours not only provide structure and texture, but they also offer unique flavors that contribute to the bread’s distinct, tangy profile. Combined with a well-made starter, these gluten-free flours create a loaf that’s just as satisfying as any traditional sourdough.
3. The Health Benefits of Gluten Free Sourdough Bread
Another reason to love gluten free sourdough bread is the health benefits that come with it. Traditional bread, which is often made with refined wheat, can spike your blood sugar and leave you feeling sluggish. On the other hand, the slow fermentation of sourdough naturally lowers the glycemic index, making gluten free sourdough bread a better option for maintaining balanced energy levels throughout the day. Plus, the fermentation process enhances the bread’s nutritional profile by breaking down compounds like phytic acid, which can otherwise hinder nutrient absorption.
4. A Unique Flavor and Texture You Won’t Find Anywhere Else
When you bake gluten free sourdough bread, you’re not just making bread—you’re creating a flavorful experience. The natural fermentation gives this bread its signature tang, while the combination of gluten-free flours ensures a texture that’s soft yet chewy with a slightly crispy crust. It’s the kind of bread that makes your taste buds dance and satisfies both your hunger and your craving for something truly special.
Step-by-Step Guide to Making Gluten Free Sourdough Bread
Making your own gluten free sourdough bread from scratch is easier than you might think, and the results are absolutely worth it. Whether you’re new to gluten-free baking or a seasoned baker looking to expand your skills, this step-by-step guide will walk you through the process to create a soft, tangy loaf that rivals anything you can buy at the store.
1. Preparing Your Gluten Free Sourdough Starter
The key to a successful gluten free sourdough bread lies in the starter. Without it, your dough won’t ferment properly, and you’ll miss out on the characteristic tangy flavor that sourdough is known for. Here’s how to create your starter from scratch:
- Ingredients for the Starter:
- Gluten-free flour (brown rice flour or sorghum flour are great choices)
- Water
- A small amount of apple cider vinegar (optional, helps with fermentation)
- Method:
- Mix equal parts flour and water in a jar. A good starting ratio is 1/2 cup of flour and 1/2 cup of water.
- Stir well to create a thick, smooth batter.
- Cover loosely with a cloth and let it sit at room temperature for 24 hours.
- For the next 5-7 days, feed your starter with more flour and water each day. You’ll start to notice bubbles forming as wild yeast begins to grow, indicating your starter is ready.
Tip: If your starter hasn’t developed bubbles after a few days, try using a warmer spot in your kitchen or adding a spoonful of honey to encourage yeast growth.
2. Mixing Your Gluten Free Sourdough Dough
Once your starter is bubbly and ready, it’s time to mix the dough. This part of the process is crucial to getting the right texture for your gluten free sourdough bread.
- Ingredients:
- 1 cup of active gluten-free sourdough starter
- 2 cups of gluten-free flour blend (a mix of brown rice flour, sorghum flour, and tapioca starch works well)
- 1 tablespoon of psyllium husk (this helps with structure and elasticity)
- 1 1/2 cups of warm water
- 1 tablespoon of apple cider vinegar
- Salt (to taste)
- Method:
- In a large bowl, combine the starter, flour, psyllium husk, and salt.
- Slowly add the warm water and apple cider vinegar, stirring continuously to form a dough.
- The dough should be sticky but manageable. If it’s too dry, add a little more water, one tablespoon at a time.
- Knead the dough for about 5 minutes, ensuring it’s well-mixed but not overworked.
Tip: Gluten-free dough won’t behave like traditional dough, so don’t worry if it’s a little wetter or stickier than you’re used to.
3. Proofing and Shaping Your Bread
Proofing your dough is the next step to achieving that light, airy texture. Here’s how to do it properly:
- Method:
- Place your dough in a lightly oiled bowl and cover it with a damp cloth.
- Let the dough rise for about 4-6 hours at room temperature, or until it has doubled in size.
- Once your dough has risen, gently shape it into a loaf or transfer it into a proofing basket (or a parchment-lined baking pan).
- Let it proof for another 1-2 hours, allowing the dough to relax and rise a bit more.
Tip: If you don’t have a proofing basket, a regular bowl lined with parchment paper will work fine. Just make sure the dough isn’t too tightly packed.
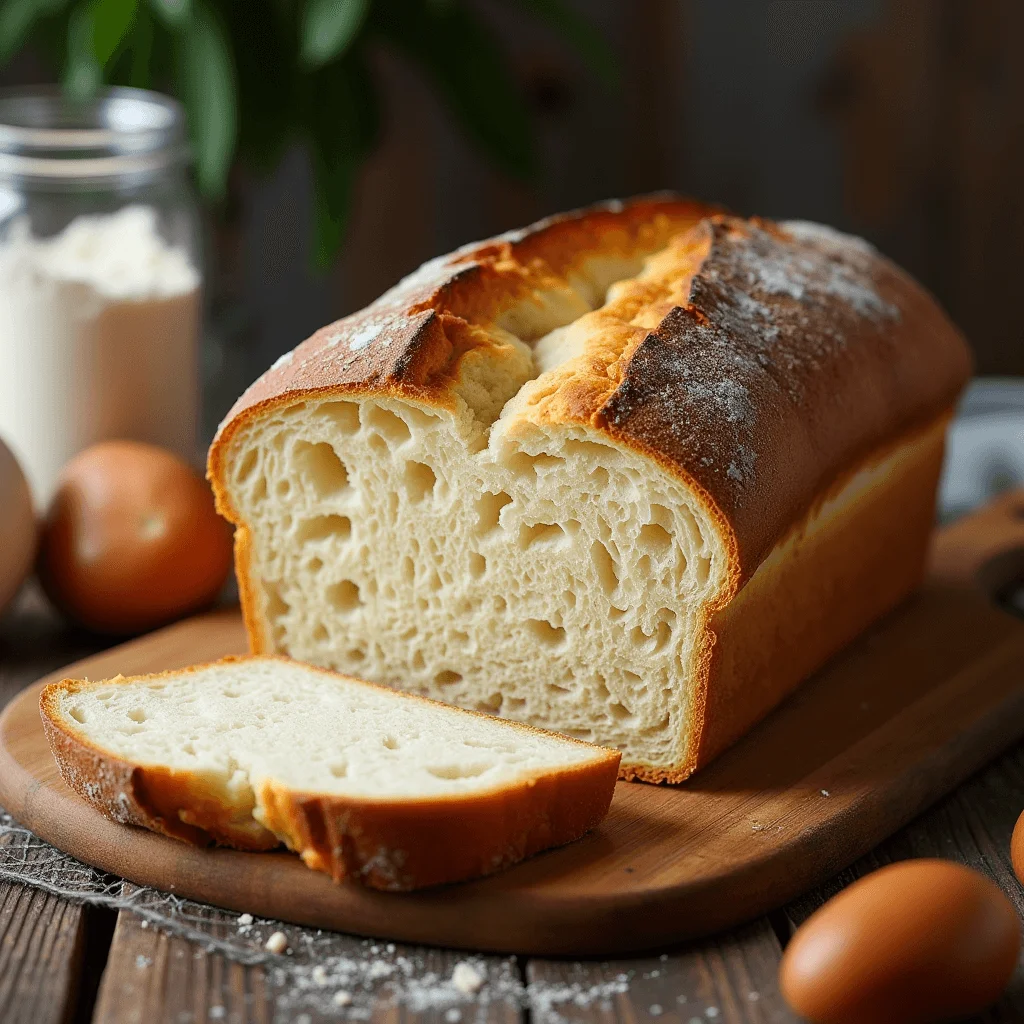
4. Baking Your Gluten Free Sourdough Bread
Now comes the most exciting part: baking! Getting the perfect crust and crumb is the goal, and it’s all about timing and temperature.
- Method:
- Preheat your oven to 450°F (230°C) and place a Dutch oven or a baking stone inside to heat up.
- When ready, carefully transfer your proofed dough into the hot Dutch oven or onto the preheated stone.
- Cover the Dutch oven with its lid (if using) and bake for 30 minutes. After 30 minutes, remove the lid and bake for an additional 20-30 minutes to get a golden, crispy crust.
- Let the bread cool on a wire rack for at least 1 hour before slicing. This resting time helps set the crumb and gives the bread its final texture.
Tip: For an extra crispy crust, try adding a few ice cubes to the bottom of the oven before baking. The steam helps create that perfect bakery-like crust.
Pro Tips for Perfect Gluten Free Sourdough Every Time
Baking gluten free sourdough bread at home can be a truly rewarding experience, but it requires a bit of finesse and attention to detail. Whether you’re a beginner or have tried your hand at gluten-free baking before, these pro tips will help you take your sourdough to the next level, ensuring you achieve a deliciously soft, tangy loaf every single time.
1. Use the Right Gluten-Free Flour Blend
Not all gluten-free flours are created equal, and choosing the right one is essential to achieving the texture and flavor you want. While you can experiment with different blends, here’s a general guideline to help you pick the best flours for your gluten free sourdough bread:
- Brown Rice Flour: A great base for structure and texture.
- Sorghum Flour: Adds a mild, slightly nutty flavor.
- Tapioca Starch: Helps with the elasticity and chewiness.
Always opt for a gluten-free flour blend that mimics wheat flour’s structure, and avoid overly processed flour mixtures that might not give you the texture you’re aiming for.
Tip: If you’re making your own flour blend, aim for a ratio of 40% starch (like tapioca or potato starch), 30% whole grain flour (like brown rice or sorghum), and 30% binding agents (such as psyllium husk).
2. Don’t Rush the Starter
The key to excellent gluten free sourdough bread is in the starter. A well-maintained, active starter is essential for creating that signature tangy flavor and achieving proper fermentation. Here’s how to make sure yours is up to the task:
- Feed Your Starter Regularly: Make sure to feed it at least once a day with equal parts flour and water until it becomes bubbly and has a noticeable sour aroma.
- Use the Right Flour: Stick to gluten-free flour for feeding your starter to avoid any cross-contamination or inconsistent results.
- Patience is Key: It takes about 5-7 days for your starter to develop, but don’t rush it—give it the time it needs to become robust and active.
Tip: If your starter seems too thick or sluggish, add a small splash of water or use a bit more flour during the feeding process. The consistency should resemble pancake batter.
3. Pay Attention to Proofing Times and Temperatures
Proofing is a crucial step that determines the final rise and texture of your gluten free sourdough bread. Unlike regular bread, gluten-free dough doesn’t rise as much or as quickly, so patience and proper environment are key:
- Room Temperature Proofing: Proof your dough at room temperature for about 4-6 hours. Gluten-free dough often takes longer to rise, so don’t rush the process.
- Warm, But Not Hot: Ensure your dough is proofing in a warm place (ideally 75-80°F or 24-27°C). Too much heat can kill the yeast, while too little can slow down fermentation.
Tip: If your kitchen is cold, try proofing your dough in a turned-off oven with the light on to create a warm environment.
4. Maintain Proper Hydration
Hydration plays a major role in the texture of your gluten free sourdough bread. Gluten-free dough tends to absorb more moisture than traditional dough, so adjusting the water content is essential to avoid dryness or a dense loaf.
- Sticky Dough is Normal: Expect the dough to be wetter than typical wheat-based dough, but it should still hold together well.
- Adjust Gradually: Add small amounts of water or flour as needed to reach the right consistency. If the dough is too dry, your bread may be too dense; if it’s too wet, it might not hold its shape.
Tip: Always add the water gradually, as gluten-free flours can absorb liquid at different rates. Keep an eye on the dough’s texture, and feel free to adjust accordingly.
5. Bake with Steam for a Crispy Crust
If you want that perfect, bakery-style crust, baking with steam is a must. The steam helps develop a crispy, golden-brown exterior while keeping the interior soft and tender. Here’s how to do it:
- Dutch Oven Method: Use a preheated Dutch oven with a tight-fitting lid to trap steam during the first part of baking.
- Add Steam: If you’re not using a Dutch oven, place a baking dish of water in the bottom of the oven to create steam. You can also spritz the dough with water before putting it in the oven.
Tip: For even better results, after 20-30 minutes of baking with the lid on (if using a Dutch oven), remove the lid to allow the crust to fully crisp up.
6. Let It Cool Completely Before Slicing
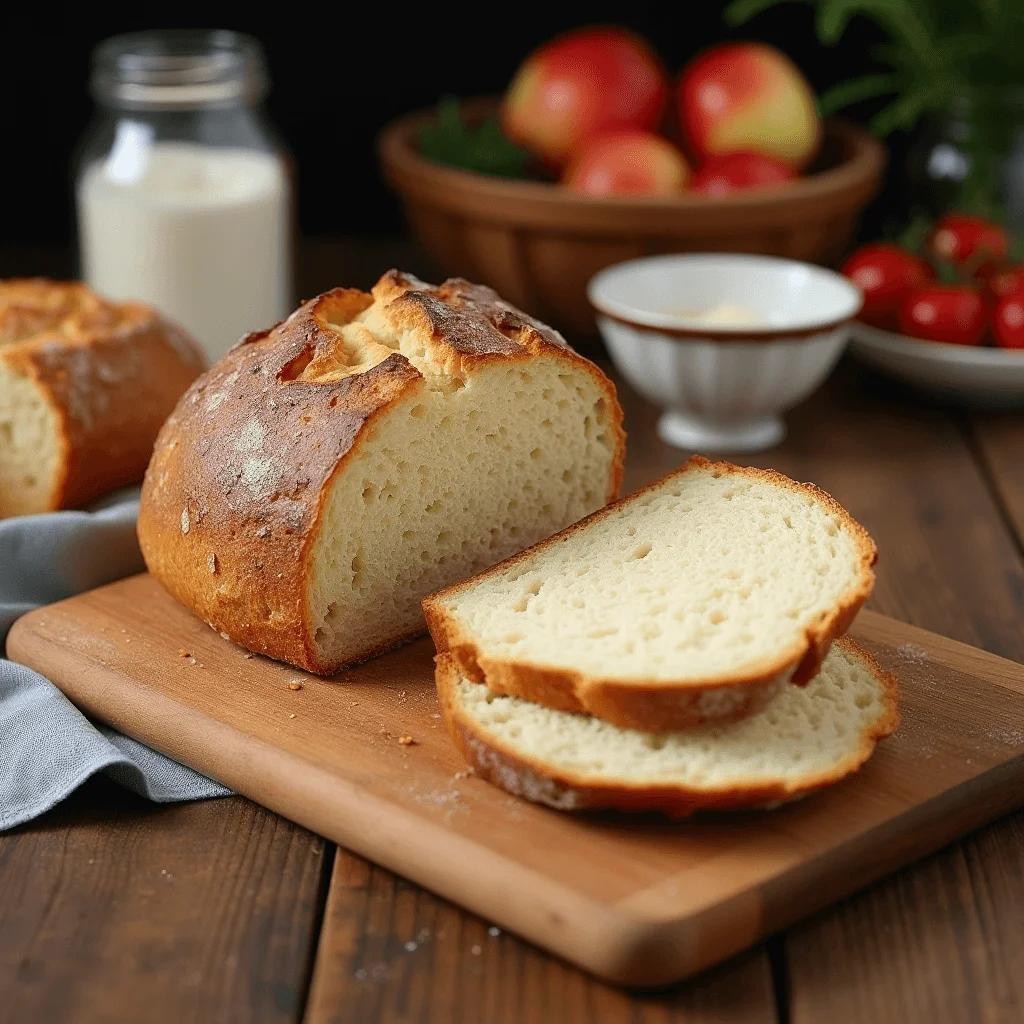
Once your gluten free sourdough bread is out of the oven, resist the urge to slice into it right away! Gluten-free bread continues to set and firm up as it cools, and slicing it too soon can result in a gummy, undercooked crumb.
- Cool on a Wire Rack: Allow your bread to cool for at least 1 hour on a wire rack before slicing.
- Check the Texture: Once the bread is fully cool, you’ll notice that the crumb should be soft and slightly chewy, with just the right amount of tang.
Tip: If you’re planning to store the bread, wrap it in parchment paper or a cotton cloth to keep it fresh. Avoid plastic wrap, as it can make the crust soft.
Conclusion: Your Perfect Gluten Free Sourdough Bread Awaits
Now that you have all the tips, tricks, and a step-by-step guide for making your very own gluten free sourdough bread, you’re ready to embark on your baking journey. From creating your own sourdough starter to mastering the perfect proofing technique, each step brings you closer to a soft, tangy loaf that you and your loved ones can enjoy.
As you begin baking, remember that gluten free sourdough bread requires a bit of patience and experimentation. It’s normal for the first loaf or two to need a little tweaking, but don’t be discouraged! With practice, you’ll soon find your rhythm and have a foolproof recipe that delivers delicious results every time.
Here’s why you’ll love making your own gluten free sourdough bread:
- You control the ingredients, ensuring they’re fresh and wholesome.
- No more settling for store-bought options that may not meet your taste or dietary needs.
- The satisfaction of enjoying a loaf that’s as good, if not better, than anything you could find at your local bakery.
Frequently Asked Questions (FAQ) About Gluten Free Sourdough Bread
1. Can I use any gluten-free flour for my sourdough bread?
When it comes to gluten free sourdough bread, the type of flour you use plays a critical role in the texture and flavor of your loaf. Not all gluten-free flours work the same way, so it’s important to choose a blend that offers structure and flavor. Popular choices include:
- Brown rice flour: Adds a hearty, slightly nutty flavor.
- Sorghum flour: Provides a mild, slightly sweet taste.
- Tapioca starch: Helps give the bread some chewiness and stretch.
If you’re experimenting with your own gluten-free flour blend, aim for a mix of whole grain flours and starches to create the ideal texture.
2. How long does it take to make gluten free sourdough bread?
Making gluten free sourdough bread requires patience, especially when it comes to the starter. Here’s a general breakdown of the timeline:
- Starter Development: About 5-7 days to build a strong, active starter.
- Dough Preparation: Approximately 1-2 hours for mixing and kneading.
- Proofing: 4-6 hours, depending on the temperature of your kitchen.
- Baking: 45 minutes to 1 hour.
In total, you’re looking at about a week for your first loaf (including starter prep), but once the starter is established, it will take much less time for future batches.
3. Can I make gluten free sourdough bread without a starter?
While a traditional gluten free sourdough bread recipe requires a sourdough starter to develop that signature tangy flavor and rise, you can also try making a “quick” version using commercial yeast. However, keep in mind that this won’t have the same depth of flavor or texture that comes with a natural fermentation process. If you’re new to gluten-free sourdough, we recommend giving the starter method a try, as it delivers the best results in terms of flavor and texture.
4. My gluten free sourdough is too dense. What went wrong?
If your gluten free sourdough bread turns out dense or heavy, there could be a few reasons:
- Under-proofing: Gluten-free dough needs more time to rise than regular bread. Make sure you’re allowing enough proofing time.
- Too much flour: Gluten-free dough tends to absorb more liquid, so it’s important to get the hydration right. Try adding a little extra water next time to achieve the desired consistency.
- Starter Issues: If your starter isn’t active enough, the bread may not rise properly. Ensure you’re feeding it regularly and that it’s bubbly before using it in the recipe.

